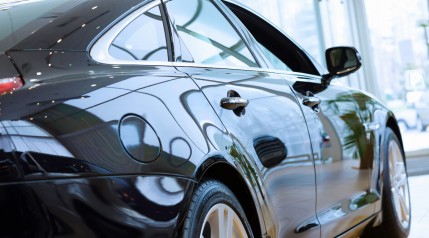
Visible swirl marks are to the flat surfaces of your car what acne is to the skin – nothing fatal, but darned unsightly and something you want to get rid of if you can. The good news is that doing so is a great deal easier than shifting zits from your face.
In this article, we’ll let you in on everything you need to know about swirl marks. As well as learning what causes them, you’ll discover how to remove swirl marks in a step-by-step process, and what equipment you need to use to get the job done.
We’ll also discuss what you’ll need to do in severe cases and how a professional can help if you can’t handle the situation on your own. Last but not least, we’ll share important tips to prevent swirl marks from appearing on your vehicle again in the future.
Key Takeaways
- Keep It Clean! – To avoid doing further damage to your paintwork, use only clean rags and auto-specific cloths during this car-detailing process.
- The Causes – Swirls are almost always caused by either over-exuberant hand cleaning or overly frequent visits to automated car washes.
- DIY or Pro? – Trying to remove the swirls on your own could save you hundreds of dollars, but if the damage is deep then you may need to visit an auto detailer to fix it.
Equipment Needed to Remove Swirl Marks from Cars
In the following sections, we’ll be explaining why choosing the right supplies when trying to remove those swirls from your car’s exterior is crucial.
The following is a list of items and tools you need to remove swirl marks:
- Tool of choice—pad or machine.
- Safety gear.
- Car-safe shampoo and sponge or specialized car wash mitt.
- Microfiber drying towels.
- Light-grade clay bar. (Choose one from our guide to the best clay bars if you don’t already have one.)
- Swirl mark remover or polishing compound.
- Paint sealant or car wax.
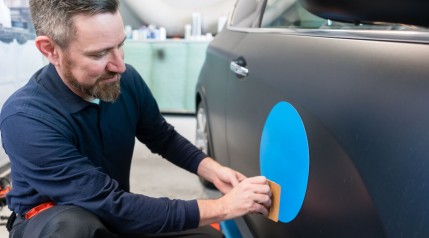
Polishing Pad or Machine
The choice entirely depends on you. Detailing novices may be better off using applicator pads on swirl marks by hand, even though it may take longer.
Motorized polishers take some practice to get used to. If you’re already familiar with these tools, or have one at home, take advantage of it.
Note that high-speed orbital polishers are more powerful than dual action types. They’re also less user-friendly for inexperienced detailers.
Since the rubbing compound you’ll be using will be abrasive, it’s best if you pick a softer pad. An aggressive pad with a harsh compound will make the scratches and swirls worse than they already are.
Access to a Water Source and Bucket
Ideally, you should have a hose nearby. If not, you need access to a water source to refill your bucket for rinsing if using the two-bucket wash method described below.
Safety Gear
When handling these substances, it’s better to be as safe as possible and wear gloves.
Those of you with asthma or respiratory sensitivities may want to put a mask on, too. Some chemicals can trigger an episode or attack!
Car-Safe Shampoo and Sponge or Wash Mitt
Buy a shampoo that’s made to be used on cars. You may not see a clear difference right off the bat, but your paint job will be grateful for it! Car wash mitts and sponges are fabricated to be non-abrasive to avoid paint surface scratches. Pick one that you’re comfortable using and buy it.
Microfiber Cloths
Those crusty hard towels or rags are fit for drying tires, but not the body of your vehicle. Invest in quality microfiber cloths for polishing the vehicle, wiping and drying. Not only are they soft, but they catch oils and dirt better than conventional towels. The alternative is wasting rolls of paper towels, which isn’t eco-friendly.
Light-Grade Clay Bar and Lubricant
Clay bars come in grades ranging from mild to severe. The harder it is, the more aggressive it will be. Since your car’s paint is already swirled, opt for a lighter grade.
Swirl Mark Remover or Polishing Compound
If you were to search online for swirl mark removers, and you’ll come up with a whole lot of results and different options to choose from.
You can choose any polishing product (such as paint cleaners) if you don’t want to buy a specific swirl mark remover, but be warned that it may not be as effective.
Paint Sealant or Wax
This is optional, but highly recommended. Wax or a sealant will add a glossy shine and protect your car’s paint too.
Preparing Your Vehicle for Swirl Mark Removal
If you identify swirl marks on your ride, the first step is to prepare the surface area they need to be removed from.
Grime will interfere with the product you apply. If you use a motorized polisher, dirt will grind further into your paint job, and that’s the opposite of what we’re trying to achieve here.
Preparation involves these easy steps:
- Park in a suitable area.
- Mix car shampoo with water.
- Scrub down your vehicle.
- Rinse off soap and dry.
- Clay bar your vehicle.
- Perform one final rinse.
Step 1: Park in a Suitable Area
Detailing work and subjecting your vehicle to direct sunlight don’t go hand in hand.
Instead, choose a shady place where you can park for a few hours. Make sure you have good visibility, too—if it’s too gloomy, you won’t notice swirl marks disappearing.
Step 2: Mix Car Shampoo with Water & Scrub Down Your Vehicle
Set your bucket down and mix the shampoo with water, as directed. Make sure it’s nice and frothy.
Dunk your wash mitt or sponge in the bucket to get it sudsy. Start washing your vehicle from the top down (roof to tires) until it’s spotless. Any remaining dirt or brake dust might actually lead to the paintwork being damaged during claying.
Step 3: Rinse Vehicle Off and Dry
Rinse the entire vehicle off until it’s free of soap. You can either let the air dry it, or wipe it down with your microfiber cloths to get it to dry faster.
Step 4: Time to Clay Bar
It’s your decision if you want to clay bar only the swirled sections or the whole vehicle. If you are applying sealant later, you need to do this to the entire car.
Spray your lubricant on the bar and squeeze it to soften it. Next, coat small sections of the exterior in lubricant and start treating them one at a time.
Don’t push down too hard or rub it violently, though. Drag the bar using smooth motions, repeating until it stops collecting contaminants.
Step 5: One Final Wash and Rinse, Then Dry
Wash and rinse your vehicle by repeating steps one to four. After you’re done, you can leave it to dry naturally or help it along with microfiber towels.
Method 1: How to Remove Swirl Marks from Cars by Hand
Working on removing swirl marks by hand will give you a greater measure of control over what you’re doing. If using a machine sounds intimidating to you, this method is preferable.
Now that the vehicle is spotless, here’s what you’ll need to do:
- Apply your product of choice to your pad.
- Treat affected areas.
- Wipe off excess product.
- Polish your vehicle with a microfiber cloth.
Step 1: Apply Product to Pad or Car Surface
Read the label of your swirl mark remover or polishing product, and apply it to your pad or the surface of your vehicle as directed.
As you would usually do with washing, begin with the upper sections first.
Step 2: Treat Affected Areas
Rub your pad in circular motions until no more product remains. Keep the pressure even on the whole pad; don’t favor one side more than the other.
Remember to work on small sections and not to be too rough while doing this. Also, try not to let the substance dry on your vehicle, as it will be harder to distribute this way.
Once the area is swirl-free, wipe off any residual product with a clean cloth.
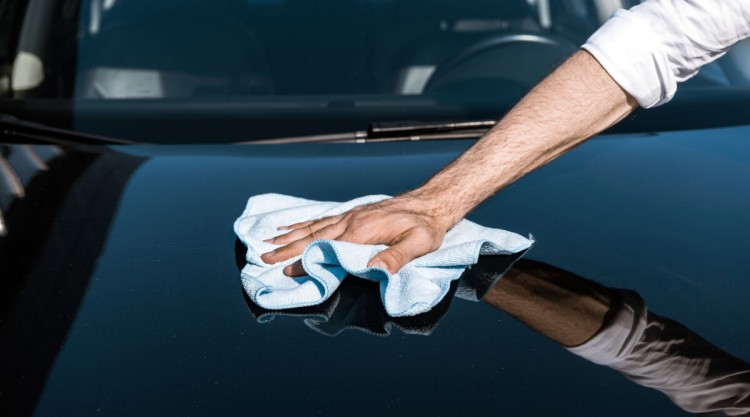
Step 3: Polish with Microfiber Cloth
Polish the section you just treated. The surface is now ready for you to apply the wax or sealant to it.
Method 2: Removing Swirl Marks With a Motorized Polisher
Machine polishing will shorten the time you spend restoring your car’s exterior. There isn’t much difference between what you do here and a standard polishing job.
Here’s a list of the steps you’ll need to take:
- Set up the abrasive polisher.
- Put on fresh gloves and a mask if needed.
- Apply your product to the pad or your car’s surface.
- Switch on the machine and begin polishing.
- Use wax or paint sealant.
Step 1: Set Up Polisher
Plug in your polisher and attach the pad to it. Keep it at a low setting: since you’re performing restorative work, it’s important to be gentle.
Step 2: Put on Fresh Gloves and Mask if Needed
If you were using latex gloves, grab a fresh pair. Reusable gloves need to be dry before you start, so that they don’t drip on your vehicle.
Put a mask on if the brand of polisher or swirl remover you’re working with recommends it.
Step 3: Apply Product of Choice to Your Pad or Car’s Surface
As specified by your product’s guidelines, apply the car’s surface with a clean applicator pad, distributing it evenly.
Work section-by-section, top to bottom. The result will look better than trying to tackle larger sections and missing spots.
Step 4: Switch on Machine and Begin Polishing
Switch it on and start to apply the polisher. Run the machine over the affected surface using slow, circular motions.
Try not to linger on any one spot for too long. After a couple of minutes, the product should be fully distributed. Repeat with all the sections of your vehicle.
Step 5: Use Wax or Paint Sealant
Once you’ve finished polishing, you can preserve the glossy, unmarred shine by adding a layer of car paint sealant or wax.
What Are Swirl Marks?
These defects are the result of micro-marring. Fine scratches on your car paintwork appear as swirls that range from faint to deep.
Black or dark-colored cars get the shorter end of the stick here. Faults are more apparent on dark-colored paints than on lighter and brighter colors.
Modern automotive paint is a far cry from the simple pigments of the past. Modern-day formulations are made to resist everyday menaces like heat, corrosion and scratches.
Coatings are getting stronger all the time. People keep their vehicles for longer, prompting the need for paint that won’t deteriorate after only a few years.
Unfortunately, innovations so far aren’t all-encompassing, though. They shield against the occasional rough car wash or sharp branch, but an active attack on your exterior will still leave some clear evidence.
What Causes Swirl Marks?
We have some potentially shocking news (or not): The primary cause of these unpleasant blemishes is probably you. Or, whoever is responsible for washing and caring for your vehicle.
These are the habits that usually leave swirl marks behind:
- Rough sponges or cloths.
- Frequent trips through automated car washes.
- Incorrect use of a motorized buffer or car polisher.
- An abrasive or dirty car cover.
- Inappropriate detergents or non-automotive products.
Rough Sponges, Brushes or Cloths
What have you been using to wash and dry your vehicle as of late? Kitchen sponges, ancient dried-out towels, a dirty car duster, and rigid brushes aren’t suitable for paint.
These items are all too rough, and each time you subject your exterior to such items, you micro-mar it and create minor paint defects.
Now imagine unknowingly doing this for years on end … It shouldn’t be a surprise that whole sections of your vehicle are seriously degraded, creating swirl marks aplenty!
Frequent Trips Through the Automated Car Wash
If performed too frequently, the downside of car washes can outweigh the benefits.
Putting your vehicle through a wash more than once or twice a month can start to wear on your paint surface.
Incorrect Use of Motorized Polisher
Polishers and buffers are great tools, as long as they’re used the way they were meant to be operated. On the other hand, people who don’t know what they’re doing can do a lot of damage to their vehicles.
These machines can burn through your paint if misused. Applying an abrasive compound incorrectly (e.g., rough, random motions) will scratch the exterior.
You aren’t doing your vehicle any favors by over-doing it and using an excessive amount of polisher. Each time, you’re wearing down a thin layer of paint. Once or twice a year is sufficient.
Abrasive or Dirty Car Cover
Don’t think you’re doing yourself any services by using a makeshift cover to save money. Car covers are designed with soft, paint-safe interiors. A tarp or another piece of cloth won’t have the same feature.
Do you own an actual cover? How often is it washed? The inside may have collected grime and dirt that mar your vehicle every time it’s dragged off.
Inappropriate Detergents or Non-Automotive Products
There’s a good reason why automotive-specific soaps and shampoos exist. Household detergents and non-automotive solutions can be corrosive.
Many such products contain sodium hydroxide. In high enough quantities, this chemical is corrosive.
What if the Swirl Marks Are Too Deep?
Earlier, we talked about how the depth of swirl marks on cars can vary. A motorized polisher or polishing pad will remove moderate and minor swirl marks.
If you don’t manage to eradicate all traces of the marks, at least they’ll be significantly reduced. If they’ve penetrated through to the primer or paint through the clear coat, vehicle detailing products won’t be effective.
In this instance, you’ll need to repaint or perform a clear coat repair. Remember that the coatings on your vehicle serve to shield the metal underbody from corrosion. Your exterior is vulnerable to rust if it has deep swirls and scratches.
Can I Go to a Professional?
In this scenario, the professional you go to for help is an auto detailer.
If you don’t have a local business you know and frequently go to for vehicle needs like this, do some research, get some quotes back and look at online reviews to choose one that won’t disappoint.
One thing to keep in mind is that most shops probably won’t agree to treat just one section of your car’s exterior. You’ll have to pay for the whole vehicle to be polished, which can cost anywhere from $200 to $500, based on the size of your vehicle.
Severe scratches warrant serious measures, too. Polishing won’t be enough in these cases, and the detailer may recommend getting a clear coat repair, repainting, or paint correction. This can cost upwards of several hundred dollars, depending on the size of the swirly area.
How to Prevent Swirl Marks in the Future
We have good news for you: Since human error is the prime cause of most swirl marks appearing on vehicles, prevention is very possible (and straightforward).
Follow these tips to prevent micro-marring from downgrading your paint job:
- Only use products and tools that were specifically designed to be used on vehicles.
- Don’t be too aggressive with care. Overdoing something can be equally as damaging as neglecting maintenance tasks in the first place.
- Buy a quality car cover and keep it clean.
Use Automotive Products and Tools
This is non-negotiable, and can go a long way towards limiting owner-inflicted damage.
Household sponges and detergents should stay inside your home, and you should only use ones that were specifically designed to be used on vehicles.
It’s better to let your vehicle stay dirty for the time-being (or take it to a car wash) instead of using unsuitable tools and chemicals on it.
Don’t Be Too Aggressive with Care
Over-doing anything when it comes to vehicle care is usually just as bad as not doing it in the first place, and the same holds true for car washing.
Hand-washing once a week is fine, but cut down on trips to the car wash if they’re not really needed. Those big brushes go over your vehicle with a lot of force – great for removing mud or thick just, but not so great for your paintwork in the longer term.
Buy a Quality Cover and Keep a Clean Car
Using a cover is a fantastic and cheap way to preserve your paint’s integrity. It’s a simple way to protect your automobile from the elements and acidic threats that might come its way on a daily basis, such as bird poop.
Cheaper models may have rougher interiors or abrasive stitching, so be sure to choose a quality cover with a soft material on the interior.
Conclusion
Congratulations! You now know how to remove swirl marks from cars and are all set to get to work!
The important thing here is to remember that a car’s paintwork is not invincible, so every car owner needs to treat it with care.
Even if you’re wary of motorized polishers, we suggest trying the manual repair route first. Detailing shops will charge high prices for services like this, so you might be able to save yourself a couple of hundred dollars if the job goes well and you manage to pull off a fix on your own.
As long as the marks aren’t too serious, you shouldn’t have too much of a problem doing that yourself anyways!