Our cars have come a long way from the first automobiles of the early 20th century. Think of all the features the average vehicle today is equipped with: Parking sensors, LCD monitors, rear-facing cameras — the list goes on.
New technology has allowed car manufacturers to develop vehicles that are safer, more efficient, and easier to drive. As car owners, we can also take advantage of this technology to monitor the internal health of our cars. But to do so, you need to know how to use an OBD2 scanner.
An OBD2 – or ‘Onboard Diagnostics 2’ system – helps us to identify and address problems before they escalate. For instance, your tire pressure monitoring sensors (TMPS) will tell you when you’re low on air and your EVAP monitor will tell you about the health of the fuel system.
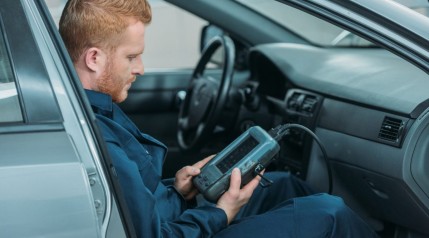
To connect to and read the onboard diagnostics from this system, you need an OBD2 scanner or code reader.
In this article, we detail everything you should know about these scanners. You’ll learn how to set one up, how to connect one, how to read one, and what the different codes displayed refer to.
We’ve also touched on the different types you can buy.
Key Takeaways
What Are They? – An OBDII scanner is a diagnostic scan tool that reads codes from your car’s On-board Diagnostics 2 (OBD II) system to check for any problems.
Ease of Use – Different types of OBDII scanners are available – basic, DIY, and professional models. Basic models are the most user-friendly but also provide the least information.
Eight Steps – Using your scanner requires just eight simple steps, all of which we take you through below.
How to Use an OBD2 Scanner
We’ve compiled an in-depth guide to using any brand of OBD scanner. However, we still recommend you read the manufacturer’s manual that came with your scan tool.
1. Prepare Your OBDII Scan Tool
Prepare your device so that it’s ready to go. Have all necessary cables and accessories at the ready.
If you have to download an application on your mobile phone or computer, get that out of the way first.
2. Find the Diagnostic Link Connector (DLC) in Your Car
You’ll have to locate the diagnostic link connector (DLC). This is the port you’ll be plugging your OBD2 scanner into.
The location can vary based on the make and model of your car. The majority of DLCs can be found underneath your dashboard on the driver’s side.
Examine the area towards the left of your steering wheel. The DLC may be open or protected by a cover or latch of some sort.
If you didn’t have success, these are the other places you can check:
- Inside or the left of the passenger’s side glove compartment.
- Behind your gearshift.
- In front of your gear shift (where USB ports usually are).
- Inside or below the driver’s side glove box.
- To the right of your steering wheel.
If the port remains elusive, consult your owner’s manual. Look through the index for “OBD II scanner” and you’ll find what you’re looking for.
3. With Vehicle Power Off, Plug Your OBDII Scanner or Code Reader Into DLC
If your engine was running or your key was in the ignition, switch it off completely. It’s time to plug your tool into the DLC or diagnostic port.
If you’re using a universal connector, be gentle when you attach it. The 16-pinned plug can be bent or distorted easily if you’re rough.
4. Turn on Car and Wait for Scan Tool to Boot
Your device may have to be manually powered on. If not, it will have already begun initializing after being connected.
Switch the ignition on without turning on your engine. You’ll witness the OBD2 scanner or code reader start to communicate with your car’s onboard computer and sensors.
Booting messages such as “establishing data transmission link” or “searching for protocol” may show up on the device’s screen.
5. When Prompted, Input Requested Data
Once your OBD2 scanner has finished booting, you’ll have to input some data. This will include information like your car’s vehicle identification number (VIN), make and model, engine type, etc.
You may want to keep your owner’s manual close by. If there’s anything you can’t recall, you’ll find it in there.
6. Initiate Reading Diagnostics
Now the actual scanning is about to begin. If you’re not sure how to initiate the reading of diagnostics, review the manual your OBD2 scanner came with. Then, press or tap the button to begin the process.
7. Wait to Complete, Then Read or Store Codes
Once all of your vehicle’s sensors have been scanned, you’ll see one or more engine fault codes appear on the screen.
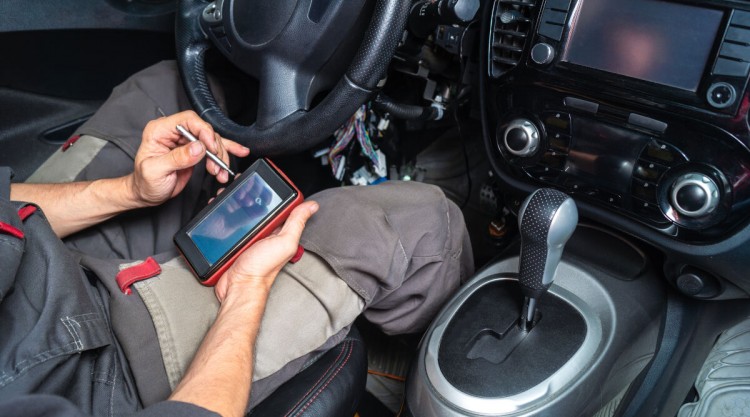
If you have a basic model, write all of them down or take a photo of the screen with your phone.
For more advanced OBD2 scanners, transfer the codes to your smartphone or laptop by way of Bluetooth.
8. Check Codes
Take out your scanner’s manual to find what the diagnostic trouble codes mean. If you aren’t able to find it, search online.
You’ll discover many supplemental codes relating to various makes and models of car. It’s almost guaranteed the one you’re looking for will be out there too.
Understanding OBDII Codes
What Letters Mean in OBDII Scanner Codes
Every five-character diagnostic trouble code (aka “DTC codes”) begins with a letter. You may have to scroll through a few menus on your device to see these active codes.
Different letters refer to specific systems in your vehicle. Here’s what each one means:
- P: Powertrain: P-codes are the largest set. They cover your engine, emissions, ignition system, fuel system, simple faults like a loose gas cap, and much more.
- B: Body: These signify trouble with your airbags, power seating, seat belts, and seat sensors. B-codes cover most of the components inside the cabin.
- C: Chassis: Chassis codes relate to the mechanical mechanisms in your vehicle. Some examples include your brakes, suspension, and steering.
What Numbers Mean in OBD II Codes
You’ll notice there are four numbers after the letter. This is what each one is telling you:
First Number (Second Character)
You’ll either see zero or a one. Zero is a generic code — applicable to all vehicle manufacturers.
The number one is enhanced or manufacturer-specific (e.g. Toyota, Ford, etc).
Second Number (Third Character)
This number will tell you the subsystem that’s showing trouble. For instance, code “P17XXX” means there’s something wrong with the transmission.
Take a look at your scanner’s manual for all the subsystem numbers.
Third and Fourth Numbers (Fourth and Fifth Characters)
These two numbers will tell you the exact problem affecting the component. Refer to your scanner’s manual or a reputable code chart online.
The following links are a good source for the codes and their meaning:
What About ISO-Reserved and SAE-Reserved Numbers?
You might see a numeric code that corresponds to one of these two terms. ISO stands for the International Standard of Organization.
SAE is an abbreviation for the Society of Automotive Engineers. Both of these institutions are involved with setting automotive production standards.
These are the trickiest codes to interpret. They usually signify that something in your vehicle is not up to the standards of either the ISO or SAE.
There may not necessarily be a broken or malfunctioning part. Instead, it could signal anything from mild, irrelevant issues to severe ones.
It’s best to solve and repair other DTCs first to see if it resolves itself.
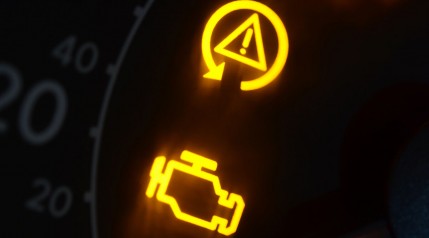
Reset Check Engine Light (If Necessary)
Your device may give you the option of resetting your check engine light. You can do this if you plan to begin repairs immediately. Check for the abbreviated “CEL” on the menu of your device.
Some of you may not want to have to look at this warning light until you visit your mechanic. It will remain off until you drive your vehicle for a certain number of miles. This period can vary based on your car’s manufacturer.
When Finished, Turn Off Car and Unplug
Once you’ve gathered the codes and stored them in a safe place, switch your vehicle off. Unplug your tool — and remember to be gentle so you do not damage the data link connector.
Erase Codes
You can clear codes to remove data stored in your scanner. To do this, just scroll down the list, select this item, and confirm that you wish to erase.
What Is an OBD II Scanner?
An OBD2 scanner is a diagnostic scan tool designed to read codes from your Onboard Diagnostics 2 (OBD II) system. They scan the system to check for any potential malfunctions. If any are found, the OBD2 scanner will show you trouble codes or “error codes”.
Each letter and number in the error code will tell the car owner what system in their car may have a problem, and what that problem is.
What Is the OBD II System?
The Onboard Diagnostic System (II) is your car’s auto-doctor. It monitors your engine’s electronic sensors, emissions control, and more. This is accomplished through sensors located throughout your vehicle that monitor what’s going on when your car runs.
OBD II is the improved version of the original OBDI, which was developed in the 1980s. In the United States, every car built after 1996 includes the upgraded system.
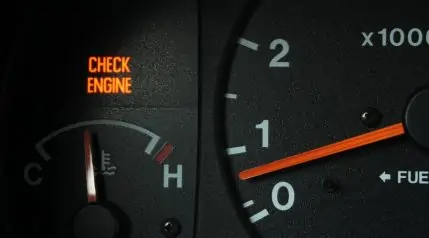
The old model was primitive in comparison. All that would happen is the appearance of a malfunction light (“check engine” light) on your dashboard. If an issue was detected, you’d have a hard time getting to the bottom of it.
The revised code-based system is far more accurate. That’s why it requires a scan tool in the form of an OBD2 scanner to be read — there’s too much information to fit in a simple dashboard indicator light.
Types of OBD II Scanners
You can choose between one of three types of scan tool: basic, DIY, or professional. Depending on the brand, they can provide varying bits of information.
Basic
The name tells you everything you need to know. Basic models tend to be the most affordable and simplistic varieties on the market.
They typically resemble standard scanners, with a small screen. These types will tell you the fault code so you can determine what the problem is if you get the dreaded check engine light on your dash. It doesn’t get any more specific than that — no repair solutions, no additional information, etc.
A basic unit is a good choice for those of you who aren’t interested or able to perform repairs on your own. All you have to do is show the diagnostic codes to your car mechanic.
It could also be suitable for those of you who are mechanically fluent. A code may be sufficient for you to know how to fix it.
Do It Yourself (DIY)
DIY models are a step up from basic units. They’ll appeal to car enthusiasts and tech-savvy users.
You’ll receive more information than just a code. Depending on the brand, you may also get live data and recommended repair solutions. Some will also provide you statistics about aspects like your fuel consumption or average speed, and some can even perform an emissions test.
They can come in a few forms. Some are handheld scanners, like basic models but with additional features. Others are Bluetooth OBDII dongles that can transmit diagnoses wirelessly to your smartphone or laptop.
Professional
Professional-grade units are top of the line. They’re similar to the scanners car manufacturing factories and professional mechanics use.
These provide thorough diagnostic information as well as potential solutions. Plus, they can save data to allow you to compare it over time.
A professional-grade device can be expensive. Unless you have a home garage and work on your car often, the expense may not be worth it.
How Does an OBD II Scanner Work?
Pre-1996 varieties usually required a separate power source. Nowadays, almost every model can be connected straight into your vehicle’s diagnostic link connector.
You may require a universal connector for particular brands. The tool will then begin to interact with your OBD II system.
Information is transmitted from the sensors to the OBD2 scanner through the port. Once the reading is complete, the collected data will be available for you to review.
Conclusion
Now that you know how to use an OBD2 scanner, you can stay on top of your vehicle’s health by making use of this device to determine what’s wrong if you have a check engine light lit up on your dashboard.
If something isn’t right with one of your airbags you won’t know — until it deploys. The same can be said of “silent” malfunctions that can occur in other crucial components. But if the OBD system picks up on an issue, you now know how to find out what it is.
Do you have any questions for us or stories to share? Please feel free to leave us a comment with your feedback. We’ll make sure to respond to each one of you!