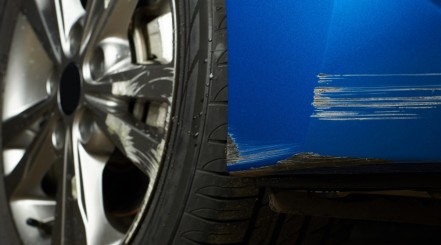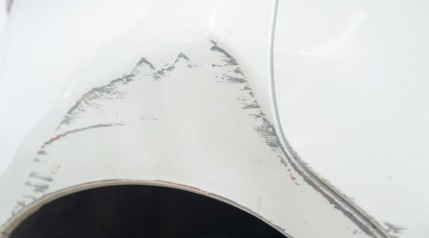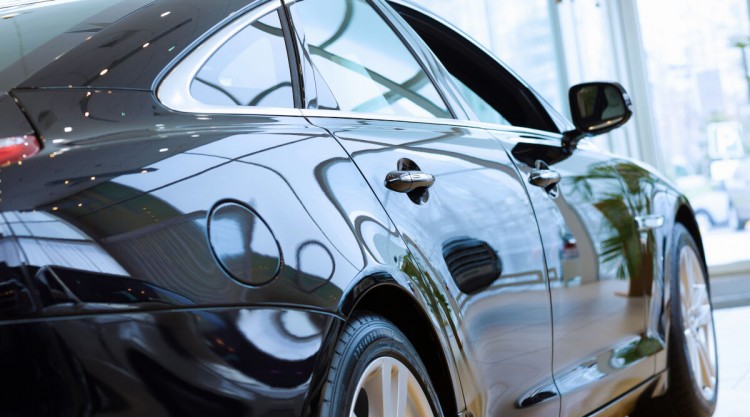
Most modern vehicles are sprayed with a clear coat before leaving the factory. This colorless resin gives your paint a glossy, sleek look.
When the coat becomes scratched or begins to peel, it doesn’t look pretty. In some places, it might not be noticeable. But if it’s in a visible area, like your hood or upper door panels, it’s sure to rankle every time you cast your eyes at your ride.
If you’re dreading getting a quote to fix it from your local detailing shop, we have good news: with the right tools and supplies, you’ll be able to complete clear coat repair at home. Those of you who are familiar with detailing should find this chore a breeze to complete.
In this guide, we’ll take you through all the preparatory steps involved in clear coat repair. Then, you’ll get explicit instructions for each step of the actual job.
Before that, though, we’ll delve into a few safety precautions to help you steer clear of trouble on the job. We’ve listed everything you’ll need below, including how much time to set aside.
Key Takeaways
- Wear PPE – Inhaling fumes from your clear coat can cause respiratory distress and irritation to your skin, eyes, nose, and throat, so wear a mask and protective eyewear.
- Keep It Dry – After applying your new clear coat, you can drive your car if necessary, but it’s best not to do so in wet weather.
- Set Aside at Least a Few Hours – This is a time-consuming job, so clear your schedule for a full morning or afternoon.
Contents (Jump to Topic)
- 1 Key Takeaways
- 2 Before We Start – Safety Precautions
- 3 Clear Coat Repair: Step-by-Step Instructions
- 3.1 1. Clean the Area That Needs Repair
- 3.2 2. Clay Bar the Area to Remove Surface Contaminants
- 3.3 3. Lightly Wet-Sand the Area to Be Repaired
- 3.4 4. Wipe With Pre-Paint Prep
- 3.5 5. Mask Off and Cover Around Area to Protect
- 3.6 6. Put on Safety Gear and Spray Clear Coat
- 3.7 7. Remove Masking, and Sand Treated Area to Blend In
- 3.8 8. Buff to Bring to a Shine
- 4 Why Can’t I Just Spray Over the Damaged Area?
- 5 Summary
Skill Level: Intermediate.
Time to Complete: One to two hours (excluding the 24–72-hour cure period prior to blending).
Equipment Needed:
- Personal protective equipment (PPE) – Overalls, gloves, face mask, and goggles.
- A good car shampoo.
- Car-safe sponge or wash mitt.
- Bucket and water.
- Clay bar (light grade).
- Clay bar lubricant.
- Microfiber cloths.
- Tack cloth.
- Paint-safe masking tape.
- Newspaper (optional).
- Pre-paint prep kit.
- Appropriate clear coat for your vehicle.
- 1,000 to 1,200-grit scratch pad or sandpaper.
- Rubbing compound.
- Motorized polisher.
- Wool buffing pad.
- Polishing pad
- Paint protection film.
Before We Start – Safety Precautions
You’ll likely be working with a polyurethane-based coating. This means there are two crucial safety precautions to keep in mind.
Mask and Goggles Aren’t Optional, They’re Essential!
Polyurethane products contain a compound known as isocyanates. Aside from sounding intimidating, they can pose a threat to your health.
Inhaling fumes from your clear coat of choice can cause respiratory distress. Symptoms might manifest as difficulty breathing or tightness in the chest.
They can also cause irritation to your skin, eyes, nose, and throat. It’s essential that you keep your goggles and mask on when you begin spraying.
This video will elaborate on the dangers of isocyanates:
Choose a Well-Lit, Well-Ventilated Work Area
Your workspace has to be well-lit so you can see what you’re doing. You don’t need to have your nose up to your vehicle while you work.
Ventilation should also be a priority when you’re picking a place to work. The more air circulation, the fewer fumes and dust particles you’re in danger of inhaling.
Clear Coat Repair: Step-by-Step Instructions
The list of steps is long, but the task is not as daunting as it looks.
1. Clean the Area That Needs Repair
This might sound redundant at first, but it isn’t. Remember that you’re going to be sanding the area down later. Dirt and debris can be abrasive if you grind it into your paint job.
So before you start, give your car a good and proper wash.
- Wash It: Mix a good car wash soap with water in a bucket. Use your sponge or wash mitt to scrub down the part you’ll be repainting.
- Rinse Meticulously: Once it’s as clean as you can manage, rinse the surface off. Ensure that no soap scum or residue remains.
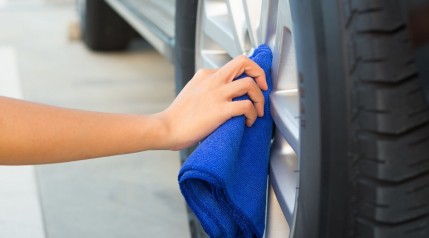
- Dry Off: Use one of your microfiber cloths to dry the area. If you don’t mind waiting, you can let it air dry instead.
2. Clay Bar the Area to Remove Surface Contaminants
A standard wash won’t be enough for the work you have ahead. The surface has to be spotless for professional-looking results.
The best car clay bars are capable of getting rid of ingrained contaminants. For instance, emission-based pollutants in high-traffic locations like highways or city centers.
Using a clay bar will also remove flaking or peeling layers. This will make for an even surface to be sanded down later.
- Spray Clay Bar Lubricant: Generously coat the area with your clay bar lubricant. You can add a squirt or two to your bar as well.
- Use Clay Bar: Squeeze the clay bar between your hands to prepare it. Rub it lightly in a side-to-side motion across the surface of your vehicle. Don’t go for big sections at once if you have a large area to repair. Limit the surfaces you’re using the clay bar on to no larger than 2 feet by 2 feet – don’t try to do an entire body panel at once.
Inspect your bar every so often. Whenever the piece you’re using gets too dirty, mold it to expose fresh clay.
- Repeat Until No Contaminants Remain: Repeat the process until your clay bar is clean when you lift it from the surface. Don’t forget to keep everything lubricated – a dry surface is more likely to be scratched.
- Wipe Away Excess Lubricant: Wipe off any remaining lubricant using a microfiber cloth.
- Wash Thoroughly: Use your car soap to wash the area. Repeat until it’s no longer slick or greasy to the touch.
- Rinse and Dry: Rinse off the soap and let the surface air dry. Or, use a fresh microfiber cloth to proceed to the next step more quickly.
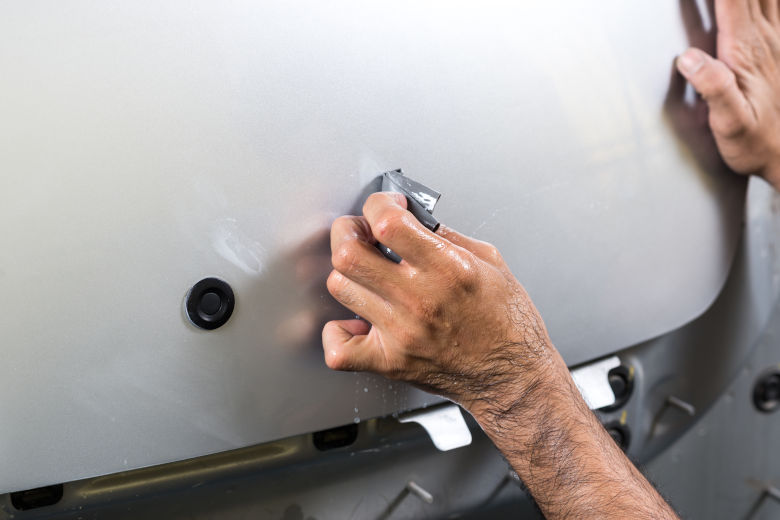
3. Lightly Wet-Sand the Area to Be Repaired
Here’s where the real modifications begin. You’re going to wet-sand the affected surface and the surrounding areas you’ll blend into.
A large number of paint job failures are due to either poor application or incorrect preparation. Since applying the coat itself is relatively straightforward, you need to take care with the sanding.
We’ll give you tips throughout so that you keep a steady hand. If you have sensitive skin, you may want to wear gloves.
Note: We do have a dedicated article on the topic of removing clear coat.
- Prepare 1,000 to 1,200-Grit Sandpaper or Scratch Pad: Mix water and a small dose of car shampoo together in a bucket. Don’t neglect to add the detergent—mild lubrication is necessary. Otherwise, your paint could be scratched.
If you’re using sandpaper, cut it into long strips that will be easier to handle. Submerge the sandpaper or scratchpad into the mixture. Leave it to sit for at least 5 minutes.
- Start Sanding: You want to be careful not to remove more than the clear coat you’re repairing. It’s best to do this by hand rather than attach your scratchpad or sandpaper to a tool. You’ll have more control over the pressure you apply. Your fingers will be a more accurate guide than a tool.
Apply firm pressure on the damaged portion. You’ll also sand a few inches beyond the area, using less pressure on your accessory of choice. This will be the part where you’ll blend the new coat seamlessly into the old later on.
- Keep Sanding Until the Area is Smooth and Dull: Continue sanding until you’re left with a smooth, unblemished surface. It should be dull rather than shiny. All traces of flaking or peeling clear coat should be entirely gone.
- Wash the Sanded Part: Wipe a damp sponge over the sanded paint until it’s clean. Keep a bucket of water to hand to wring out and rinse the sponge. Use the soft surface only, even if it’s a car-safe model.
4. Wipe With Pre-Paint Prep
Pre-paint prep will remove any residual grit from the sanded surface.
- Spray It On: Apply your pre-paint prep to the sanded surface. Don’t leave any dry spots.
- Wipe It Off: Take a clean microfiber cloth to wipe the spray off. You might have to repeat the application once or twice more until the area is grit-free.
5. Mask Off and Cover Around Area to Protect
This is the final preparatory stage before you use your clear coat. You have to protect the undamaged areas from a coating they don’t need.
- Apply Tape (and Newspaper, if You Want): Align strips of tape to the edge of the blended area. You want to be as exact as you can, so take your time. If you have to ball up a strip and try again, don’t worry. Precision is key when you’re working on your car’s exterior.
Next, continue adding strips until you’ve shielded the surrounding area. Try to cover everything near the danger zone (where you’ll be spraying).
Instead of layering tape strip by strip, you can use a sheet of newspaper. Take note that a heavy dose of your polyurethane product will likely soak through it. Masking tape won’t be impenetrable either. This covering will protect against minor spritzes only. If you work carefully, that’s enough of a safeguard.
- Make Sure Everything Is Covered: Run your fingers over the parts you just covered. Examine everything closely for any gaps that expose undamaged paint. Add more tape (or newspaper) as needed.
6. Put on Safety Gear and Spray Clear Coat
This is probably the simplest step in clear coat repair—applying the product itself. After all that prep work, you’re probably eager to begin. Let’s get that dull surface looking shiny again.
- Gear Up: Put on your overalls, gloves, goggles, and face mask. Take your time to ensure that your goggles and mask are secure; neither too tight nor too loose.
- Use Tack Cloth: Use your tack cloth on the sanded area. This will take away fine particles of dust or debris that may have accumulated in between stages.
- Prepare Clear Coat Spray: Read the instructions on the label of the product you purchased. Follow them explicitly (e.g., shake can first, spray at a certain distance, etc.). If you have an air-powered spray gun in your home garage, use that instead.
Fill the tool with your product and get to work. Using smooth, even motions, cover the area with spray from side to side. Try to keep a steady pace, so you don’t under- or over-saturate the surface. Remember the direction you sprayed the product in. This will be useful when you’re finishing up later.
- Let First Coat Dry: Give the light first coat 10 minutes or so to dry. This time may vary depending on the brand you bought. Consult the instructions to be sure.
- Apply a Second and Third Coat: Apply a second and third coating, allowing time to dry between each application that will be advised on the product you’re using. Use the same technique as you did with the first layer.
7. Remove Masking, and Sand Treated Area to Blend In
Your car’s clear coat is already on. The bulk of the chore is over. Just a little more work needed to smooth things out before you can enjoy the results.
- Peel Off Masking Once Final Coat Dries: Once the last coat you applied has dried, take off the covering you applied. Peel the tape off (and newspaper, if you used it) and throw it away. You’ll notice the treated surface might contrast to your surrounding, older clear coat. Don’t panic, you’re about to remedy this shortly.
- Wait for 24 to 72 Hours: You’ll have a well-earned day or three off. This timeframe will permit the polyurethane to cure completely, bonding to the base coat beneath it. You can drive your car if necessary, but you should be wary of water. If storms are predicted, you may want to keep your vehicle indoors.
- Wash the Treated Area: Once the cure time has ended, you’re back in action. Using the soft side of your sponge, gently wash the treated area with water.
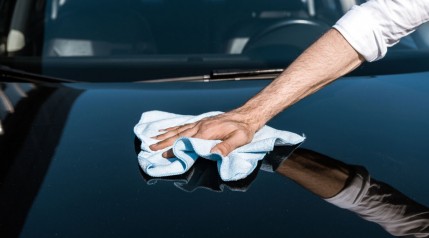
- Dry It Off: Wipe it dry with a microfiber cloth. Don’t be disheartened if it still looks odd to you.
- Wet-Sand the Blended Area: As you did earlier, wet your 1,000 to 1,200-grit sandpaper or scratchpad. Let it soak for 5 minutes submerged in water. This time, you don’t have to use soap as a lubricant.
Slowly wet sand the blended area separating the old clear coat from the new. Don’t be aggressive, or you’ll sand away the fresh coat you just applied. Light pressure will do it. You’ll be able to see when things start to look evener. You can stop sanding when you can’t see a stark difference between the treated area and surrounding clear coat.
- Wipe the Area: Wipe the whole area with a dry microfiber cloth.
8. Buff to Bring to a Shine
A good buff-and-polish is the finishing touch on any aesthetic repair. You can admire your handiwork all the better.
- Set up Motorized Polisher: Prepare your motorized polisher. Attach the wool pad and ensure that it’s on the lowest setting.
- Apply Medium-Grit Rubbing Compound: Squeeze a couple of drops of your rubbing compound onto the surface.
- Polish Carefully: Keep in mind the direction in which you sprayed the clear coat. Switch the wool buffing pad out with the polishing pad. On a low setting, polish gently in the same direction to prevent the clear coat peeling. Continue to use your polisher until the area is glossy. This may take between 3–5 minutes.
- Enjoy the Results: The treated surface should blend into the surrounding areas. You might want to give your entire car the same treatment with your polisher too.
Why Can’t I Just Spray Over the Damaged Area?
If you’ve skimmed over the article, you may wonder why there are so many steps. Wouldn’t it be easier to just apply a fresh layer over the affected surface?
Admittedly, it would be much less time-consuming and effort-intensive to do so. However, you won’t get anywhere near the same results.
The majority of clear coats are made from polyurethane. This polymerized plastic is used as a surface coating in automotive, marine, and military applications. It protects your base coat (the color of your vehicle) and the layers beneath. It requires a smooth, buffed surface to bond to.
A new layer won’t adhere well to damaged or weathered polyurethane. It’s more likely to flake off soon after application.
Summary
Trying to fix peeling clear coat on your car isn’t the kind of chore you can casually knock out in 15 minutes. You need time, patience, and a steady hand for optimal results.
Despite that, aesthetic work is always satisfying. There’s no concern as to whether something in your vehicle is broken or malfunctioning. You can also see the fruits of your labor every time you look at your vehicle.
Hey, it’s nice to know that all the effort you put in saved you from high-cost professional detailing.
Do you have any questions for us? Please leave them as a comment below. We value our readers, and we’ll get back to every one of you.