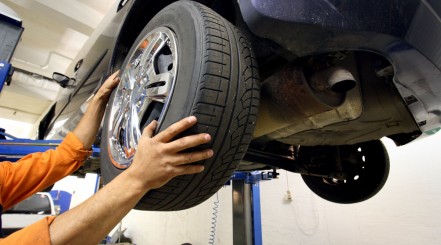
Most car owners take a degree of pride in how their vehicle looks. If this applies to you, getting any dings, scratches, or scuff marks on it is sure to cause annoyance.
No matter how much you look after your car, or how skilled you are at parking, hitting curbs and getting curb rash is nigh-on inevitable at some point in your driving career. If you don’t have rim protectors, the upshot will be wheels that look shabby at best and downright ragged at worst.
But don’t despair, this is one repair that’s not too challenging to carry out, even with no prior experience.
In this article, we reveal how to fix curb rash at home. We’ll walk you through each step of the process for different types of wheels and for scuffs and scratches little and large.
Key Takeaways
- Know Your Wheel Type – The repair process will differ depending on whether you have steel, aluminum, or chrome wheels.
- Go to a Pro – If you’re dealing with serious damage (dents or gashes), the integrity of the wheel may be compromised. In such cases, it’s best to take your vehicle to a professional for a repair or replacement.
- Easy Peasy! – The good news is that this is one car repair that almost anyone can tackle with just a few hours of free time, a handful of supplies, and a little elbow grease.
Contents (Jump to Topic)
Skill Level: Beginner.
Time to Complete: A few hours.
Things You’ll Need:
- Several grades of sandpaper (80, 220, 400, 2000, 2500).
- Water.
- Soft towel.
- Polishing towel.
- Aluminum polish.
- Protective gear (eye protection and mask).
How to Fix Curb Rash at Home – Step-by-Step Instructions
If you have aluminum or chrome wheels, you can easily repair curb rash at home. All you need to do is invest some time and hard work. And your wheels are going to look as good as new in practically no time.
Steel wheels are more complicated and you should consult a professional instead of attempting to fix these yourself.
Step 1: Check for Protection
There are many types of car wheel coatings. Before you start, check whether or not your wheels have any protective layers on them. This is where the sandpaper comes in. The sandpaper needs to be dry so that you can clearly see the type of dust that comes off.
To start, gently sand a small part of the wheel and look for the color of the dust. If it’s gray, there is no protective layer. But, if it’s white, it means your wheels have added protection that you need to remove before fixing the curb rash.
Don’t forget to use eye protection when you’re doing the following steps, to avoid getting any small particles into your eyes.
Step 2: Remove the Layer
Using sandpaper, remove the entirety of the protective layer or clear coat over your wheels. This way, when you’re done, the wheels will have the same color as well as texture all over. There must be none of the protective layer remaining on any part of the wheel.
You should be using sandpaper with 220-grit, and work on this layer until you see that the dust has a gray color, proving you are down to the metal.
If you don’t do this step, there’s going to be some visible discoloration when you finish.
Step 3: Fix the Rash
Only work on the spots that are damaged. Start with 80-grit sandpaper and work your way up to the 220-grit.
After you’ve dealt with the biggest spots, then you can switch over to sandpaper with 400-grit and use a feathering motion with your hands. This way, you can even out the rest of the wheel with the scratched area.
Make sure you regularly wipe away any dust that comes off while you’re using the sandpaper with a soft cloth.
Step 4: Perfect the Surface
Refine the repaired surface using 2000-grit sandpaper until it is completely smooth. Use it lightly and in circles, over the spots that you were previously fixing, and make sure that you even out all of the edges.
This step takes a bit more time and care to see the best results, but please do take the time to get the best results.
After that, wet the sandpaper with 2000-grit and work over the area for about 5 minutes. Switch to 2500-grit sandpaper for about a minute while it’s dry. Then wet the same sandpaper, and go over it again.
Finally, make sure you wipe down any dust with a wet, and then a damp towel to remove all residue.
Step 5: Use Aluminum Polish
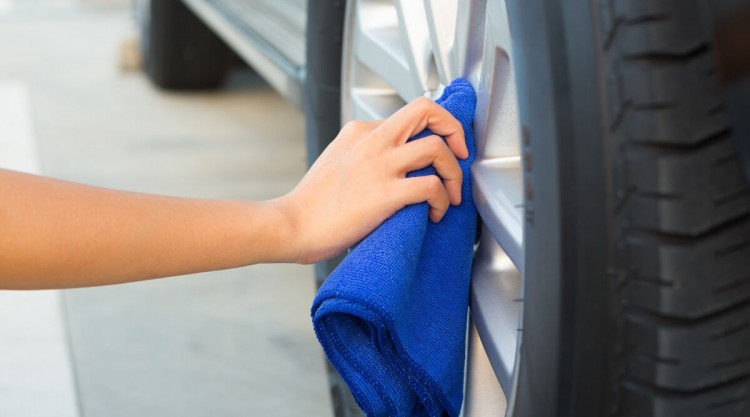
Use a soft towel and put a large amount of the aluminum polish on it.
Go over all of the previously sanded areas, as well as a small portion of the surrounding areas so that the new protective coating will blend in with the existing metal.
Use a lot of pressure when you’re polishing your wheels, enough for the towel to start going black.
Then go over everything with a clean part of the towel until everything looks nice and shiny.
This video is a great visual representation of the process in action:
What Is Curb Rash?
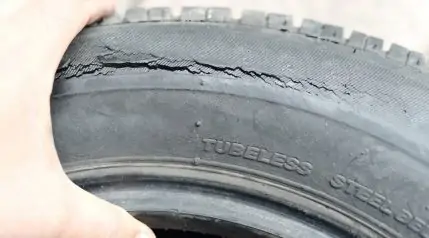
Curb rash is the term given to the bumps and scrapes that your wheels experience when parking or hitting the curb.
We’ve all heard that head-turning sound when metal meets concrete, but it can occur on any surface, not just from curbs.
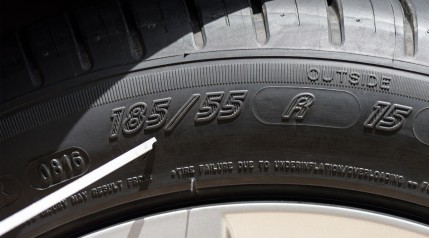
For vehicles that have large rims and low-profile tires, the sidewall and bead aren’t going to stick out much. This means that your rims aren’t going to be protected from side impact.
If the impact occurs at the wrong angle, it’s going to push the tire out of the way. The tire will end up flexing and giving, but the rims won’t. Instead, they become banged and scraped.
Tires Can Protect Against Curb Rash
Some tires have extra rubber that goes around the bead, which provides more protection to the wheel rim. However, this type of tire design has both pros and cons.
For example, if you’re driving your car slowly, the extra rubber will serve its purpose. Unfortunately, driving at such slow speeds isn’t a constant.
Additionally, you can only get these types of tires if your rims are compatible with them. Even then, the tires don’t guarantee protection. Unless your car is equipped with a set of giant tires, the rims will always be somewhat vulnerable to impact.
Why Should You Fix Curb Rash?
Aside from the fact that curb rash doesn’t look too appealing, there are some practical reasons why leaving it on your rims isn’t a good idea.
For starters, if you end up hitting a curb with the wheel, there’s no guarantee that the tire is going to be unharmed. In fact, what’s more likely to happen is the tire is going to take the initial impact, and then, after the tire gets deformed, it’s going to damage the rim.
The sidewall of any tire is actually its weakest point, especially if there is no reinforcement for the steel belts. Even with added reinforcements, tires are not made to survive any impacts from the sides. If you keep hitting things with the sidewalls, you can also tear up the rubber.
If the tire and the rim are both damaged, the wear on your tires will then be uneven, which not only means you’ll have to get a replacement sooner, but also the handling of the car is going to be impacted.
Remember, safety is paramount whenever you’re driving a vehicle!
Finally, it can increase the sale value of your car when you wish to sell it on, which is always a good thing.
Can Curb Rash Always Be Fixed?
This depends mainly on how bad the damage is and their base metal. If there are large chunks of material missing, then this is obviously more difficult to fix.
A more preventative cure is to take more care when driving. This is easy to say, of course. In our busy lives, sometimes just getting the car parked is the priority, not looking after the rims.
Steel Wheels
When it comes to steel wheels, they tend to be more durable than alloys. This means they can take a few hits and not show any curb rash. And even if you see any scratches, there’s very little to worry about.
However, if there is a bend on the steel wheels, you should always take them to a repair shop to have them fixed. The bend leads to a weakening of the metal, so they might need some welding.
Aluminum Wheels
Aluminum or alloy wheels usually come with a clear layer over them for protection. To check whether your rims have this layer, you can easily do so with some sandpaper. If the dust that comes off while sanding is white, then you know the layers are there. If the dust is gray, your rims don’t have a protective layer.
As for curb rash, you’re going to have to remove the entirety of this protective layer so that you can get to the curb rash before fixing it.
Buff the entire wheel with some sandpaper until you start seeing gray dust. After this layer is off, then you can process the surface underneath with some wet sanding of the damaged parts of the aluminum.
After sanding, wipe everything down and let it dry. Finally, you can put a layer of aluminum polish over the top to give the fixed wheels some extra protection.
Chrome Wheels
Curb rash on chrome wheels is much easier to notice and harder to repair. However, if you’re willing to put in some hard work and time, it’s still curable.
First, wear eye protection and goggles and wet-sand all of the areas that have curb rash until there are no visible pits. Then, rinse everything and let it dry.
Next, tape over the undamaged parts of the wheels, as well as the air valve stem, and spray a thin layer of spray primer over the damaged area. Next, use chrome spray paint designed for chrome wheels to apply 3–4 layers using a back-and-forth motion.
Now, let the paint dry. This can take up to 8 hours, so park your car somewhere accordingly; your car shouldn’t be driven during this drying time.
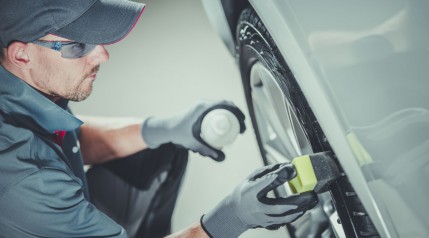
Finally, polish the chrome wheels with some chrome polish on a cotton towel.
Curb Rash Final Thoughts
Try to be careful about how you’re driving and be mindful of your surroundings. This will help to avoid hitting anything and prevent curb rash.
However, if you do happen to scratch or scuff your wheels, whether they are aluminum or chrome, you can fix any dents or deep scratches to them with the steps we’ve gone through above.
But do remember, if you have steel wheels and they are bent from the damage, it’s best to have wheel repair professionals do the job for you.
Now that you know how to fix curb rash, go ahead and give it a try. Your car will thank you for it!
Please share any tips or experiences you have had with these wheel repairs in the comments section below. If you have any questions or comments, please do let us know!