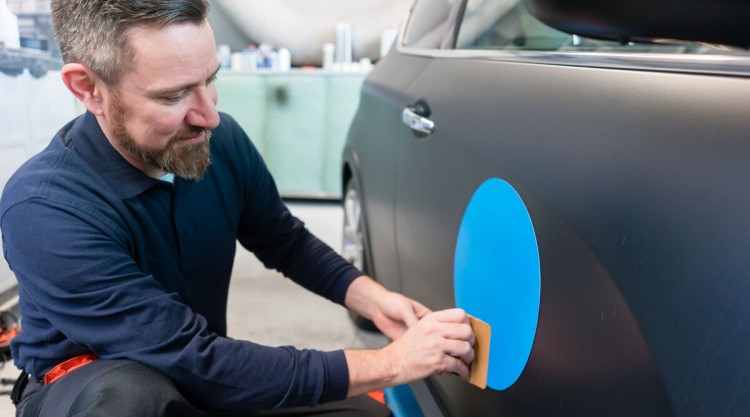
Personalizing your vehicle with the odd window or bumper sticker is fun. It lets the world know what you’re all about and can bring a little bit of identity to an otherwise kinda samey hunk of metal. It also comes in handy when trying to find your ride in a busy parking lot and is a far cheaper form of ‘bling’ than fancy fender flares of gemstone wheel trims.
With time, though, those stickers are going to become dingy-looking at best. Also, our ideas and what we’re passionate about or stand for may change, or we’ll try to sell our vehicle and need to get rid of our decals to fetch a better resale price.
Destickering is a far trickier business than most of us assume, but our guide on how to remove stickers from cars has you covered. In this article, we’re going to explain the most effective methods out there as well as detail all the tools you need to remove stickers from glass, bumpers, and your car’s interior.
Key Takeaways
- Glass, Bumper, or Interior? – The tools and supplies you’ll need vary for different surface types.
- Play It Safe – Never use a razor or cutter on the body of your vehicle, or you’ll end up ruining the paintwork!
- Household Remedies – You can save money on commercial removers by using white vinegar, olive oil, or rubbing alcohol to do the job instead.
Contents (Jump to Topic)
What You’ll Need
There are multiple options for which products you can use to remove car decals. These will depend mostly on where the sticker is located.
We list them all below for easy reference:
- Warm/boiling water.
- A hairdryer.
- A hard plastic card (e.g. credit card).
- Clean rags.
- Dish detergent.
- White vinegar.
- Window cleaner.
- Razor or cutter (only for use on glass — be extra careful not to scratch the surface.)
- Rubbing alcohol.
- Ice pack.
- Nail polish remover (only for use on glass).
- Cooking oil or olive oil.
- Specialized decal removal products.
- Leather conditioner (if your car interior is made of leather).
- Wax (for a finishing touch on the body of the car).
Optimal Solutions for Different Parts of the Car
In the following sections, we’ll go over what you need to do depending on which area in your car you’re trying to remove stickers from:
How to Remove Stickers From Car Bumpers
The following steps should work on decals that are on the body of the vehicle, without ruining the paint. Don’t bother trying to peel the sticker for now. Since you’ve probably already tried peeling your bumper stickers off, it’s time to get busy with other steps:
- Use a mixture of dish detergent and water to moisten the sticker and remove any dust or dirt.
- Next, use a hair dryer on full power (or use a heat gun) and direct the hot air in circles around the decal to soften the glue. Do not overheat, or you might damage the paint job.
- Use a plastic card to get underneath the sticker and remove it.
- If heat didn’t do the trick, boil water and apply it directly to the decal. Let the hot water soak in for at least a minute, then try removing. You can also use vinegar for the same purpose. Spray vinegar directly, or pour it on a cloth and let it soak the sticker. Leave for at least five minutes before attempting removal.
Using a window glass cleaner is another possibility. As with the vinegar, spray it on and let it soak in before removing the sticker with a plastic card.
You can also use sticker removal sprays. As the name implies, these are products specially designed to dissolve the glue and remove them.
- Once you have removed it, clean any sticker residue. You can use a glue removal product for this purpose.
- As a final step, wash the affected part and apply wax for protection.
- This is a good time for a car wash. Wash your entire car and seal with car polish.
Warning: never use a razor or cutter on the body of your car when trying to do any of this, or you’ll end up ruining the car’s paint!
How to Remove a Sticker From Car Glass
Keep the following tips in mind when trying to remove car window stickers:
- One of the best products to use in this case is cooking oil. Spray or dab it on with a paper towel and leave it for one to two hours, and then remove the sticker.
- You can use razor blades to remove glue residue by scraping it. Just be extra careful not to scratch the glass. Otherwise, try a rubber spatula or a credit card.
- Window cleaners also work well here. Spray it on and let it sit for a few minutes, then remove the decal.
- Rubbing alcohol is a product that also works well on glass. Use it to soak the sticker before you attempt removal.
- Ice is another method to try, since cold, as well as heat, works to weaken the glue. Rub an ice pack to cool over the decal for a few minutes, and then use a dull razor blade to remove sticky residue.
- Nail polish remover. You can apply an acetone-based nail polish remover on the sticker and then remove it easily. This works to dissolve the glue in the same way it does nail polish. Be careful to never use acetone-based products on your vehicle’s paintwork, though, as they may damage it.
- Sticker removal products are made especially for this purpose. Some can be used on both the body of the car and the glass parts.
- Once you have removed the sticker from your car using any of the methods above, clean the affected area with a window cleaner to remove any remaining adhesive.
How to Remove Stickers From Car Interiors
This can be tricky, depending on the material the sticker is placed on. Usually, the dashboard is made of plastic, rubber, or some other non-leather material.
Using the wrong product could ruin or discolor the part, so pay very close attention to that!
Keep the following tips in mind when trying to remove stickers from your car’s interior:
- Use a mixture of dish detergent and warm water. Soak the sticker and wait for as long as it takes to soften it thoroughly. Then, remove it and wash the area. This is safe for leather interiors too.
- You may have to repeat this a few times to get all the residue off.
- You can use olive oil to help clean the surface completely. Just apply the olive oil on a clean rag and wipe it on.
- If your vehicle’s interior is leather, you can apply a leather conditioner as a finishing touch.
Final Thoughts
Many of us go through a phase where we want to express ourselves by visually sharing our views, and what better way to do this than to post stickers on our cars that show the entire world what we’re proud of?
With time, though, they may lose their appeal. Our views might change, we might not feel as excited (or as comfortable) about sharing our thoughts as publicly anymore, or maybe it’s just time to sell the vehicle.
Removing decals poses some challenges, but as we’ve shown above, it just takes a little know-how and elbow grease to get your vehicle getting your vehicle decal- and adhesive-free and looking great.
Closing tip: If you do feel the need to bring some bling to your bumper in future, consider a bumper magnet – these are easy to apply and, importantly, far easier to remove!
Have any questions for us? If so, drop us a line in the box below. And feel free to share this post with your friends!

