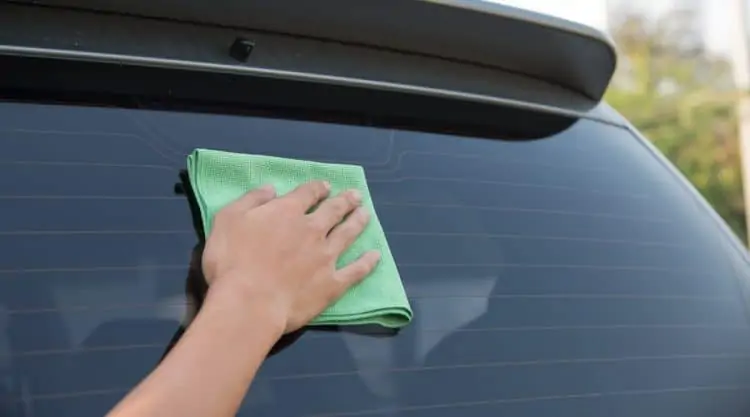
Dirty car windows are part of the price you pay for having a car. Unlike your house, your car is on the move daily, and it takes you wherever you need to be. You wouldn’t want to go out in public not looking presentable, so why should your car?
Dirty windows make your whole vehicle look messy, even if you’ve just cleaned the rest of it. Appearances aren’t the only reason to keep your windows clean, though. Sometimes it’s more serious stuff you have to be worried about, such as road glare – a problem that could turn deadly.
The good news is that dirty windows are preventable, and there are proven methods you can use to ensure your car is looking its best while also keeping you safe and not overwashing. In this guide, we teach you how to clean car windows using the best of these methods with simple, step-by-step instructions.
Contents (Jump to Topic)
- 1 Key Takeaways
- 2 What Do I Need To Do Before Cleaning My Car Windows?
- 3 What Material Do I Need To Clean the Outside of My Car Windows?
- 4 How Should I Clean The Outside Of My Car Windows?
- 5 What Material Do I Need To Clean The Inside Of My Car Windows?
- 6 How Should I Clean the Inside of My Windows?
- 7 Why Should I Clean My Car Windows?
- 8 How Often Should I Clean My Car Windows?
- 9 Are There Any Other Tips Or Tricks You Have For Me?
- 10 Wrapping It Up
Key Takeaways
Safety First! – Having clean car windows isn’t just about aesthetics but also ensuring good visibility on the road, which is key to safe driving.
Household Cleaners for the Win! – You can clean car windows without having to buy any fancy cleaning agent – distilled water, vinegar, and a little elbow grease will do the trick!
One Window at a Time – Wash each window individually to avoid missed spots and prevent drying before you’ve applied your wax.
What Do I Need To Do Before Cleaning My Car Windows?
Preparation is the key ingredient to success. Even something as seemingly small as giving your windows a good cleaning can have a dramatic impact on all of your hard work.
Make sure to give each window an initial spray-down or brief surface cleaning with a hose and clean microfiber cloth before you get into the deep-cleaning phase.
This allows the glass cleaners to do their job better, and it will allow the windows to stay cleaner for a longer time.
Also, you need to always remember that cleaning technique is more important than the product itself. As you are cleaning, attention given to the way you do it will result in a better job, even if you are using the “best” car window cleaners you can buy.
ProTip: Park in a place away from the sun to avoid evaporation. When water evaporates from your windows, it leaves behind watermarks where any leftover droplets used to be.
What Material Do I Need To Clean the Outside of My Car Windows?
Cleaning the outside of your windows is the obvious place to start. This will make it easier to see where and why the inside of the windows need to be cleaned too. Beyond running your vehicle through the local car wash, you will need the following materials and equipment if your goal is achieving streak-free windows that sparkle:
- A spray bottle
- Distilled water and white vinegar or your favorite auto glass cleaner
- 2-4 microfiber towels
- A magic eraser
- Detailing Clay
- Rain-X or detailing wax
How Should I Clean The Outside Of My Car Windows?
Step 1: Spray Your Solution
Having already completed a preliminary surface wash, spray your window with the car window cleaner or with the mixture of distilled water and white vinegar. We recommend using a 50-50 mixture of water and vinegar if you don’t want to use a store-bought car glass cleaner.
The acid in vinegar breaks down dirt and grime that sticks to the windshield, so it’s a great and possibly cheaper alternative to glass cleaner. However, both get the job done, so the choice is yours.
Step 2: Wipe
Use your microfiber cloth to wipe away the cleaner using an alternating back-and-forth and up-and-down motion over each window.
Using the same side of the cloth, spray a small amount of the distilled water and vinegar solution on the cloth, and wipe down your windshield wiper blades. This prevents dirt that accumulates on the blades from being re-applied to the windshield when in use.
If there are any greasy spots or streaks, respray that area and use the magic eraser to remove them. Any liquid that is left over should get dried up on the opposite side of the microfiber cloth used when cleaning the window initially.
If you find any bird droppings or tree sap, you may have to apply extra cleaner and wait a few minutes for it to soften the droppings before wiping them off.
Step 3: Wipe With Clay Bar
After the window completely dries up, fill your spray bottle with distilled water and spray the window again. Open your clay detailing bar and wipe the window as you had with the microfiber cloth.
The detailing clay is not necessary if you don’t want to spend the extra money, but it does pick up any remaining dirt and grime that may be trapped on the surface of the windshield.
After you have wiped the desired area with the detailing clay, wipe any remaining water dry with the opposite side of the microfiber cloth used to clean the windshield initially.
Step 5: Spray Windows With Rain-X
Spray Rain-X onto the windshield and wipe dry with a second microfiber cloth. If you don’t want to use Rain-X, you may also use regular detailing wax. Both work in the same way, using silicon to form a protective layer over the glass causing the water to bead and run off the window.
Step 6: Wax
Apply the wax with a second microfiber cloth using a circular motion over the entire window. Let the wax settle on the window for about ten to fifteen minutes. You will know that it’s ready to be wiped off when you can use your finger to draw a line in the wax, just as you would write “wash me” on a dirty car. If your finger leaves a clear trail, it’s ready to be wiped away.
What Material Do I Need To Clean The Inside Of My Car Windows?
Cleaning car windows thoroughly means treating both inside and out to a scrub. You won’t need as many materials to clean inside car windows as the outside, but doing so is just as important.
Here is what you’ll need:
- A spray bottle
- Distilled water and white vinegar or your favorite glass cleaner
- Two microfiber cloths
- A magic eraser
- A window cleaning wand
How Should I Clean the Inside of My Windows?
Step 1: Remove Dust and Dirt
Using just distilled water, spray a dry microfiber cloth to dampen it. Wipe each interior window using alternating up-and-down and back-and-forth motions to reach every area. If you need to, use the cleaning wand to reach behind the seats, in front of the steering wheel, and the rear glass of the car.
The initial “rinse” with just distilled water acts as the car wash, removing any surface dust or dirt.
Step 2: Dry
Dry each window with the opposite side of the microfiber towel used to apply the distilled water.
Step 3: Spray and Wipe
Spray your glass cleaner or 50-50 white vinegar and distilled water solution onto a second microfiber towel. Wipe clean each window as you just did with the distilled water being especially careful and gentle when cleaning tinted-glass windows.
Spraying the cleaner directly on the cloth prevents any excess spray getting onto the rest of your interior.
It’s wise to use an ammonia-free cleaner on glass surfaces if you decide not to use vinegar and distilled water. Not only can ammonia-based cleaners cause eye and throat irritation, but they can also damage your tinted windows.
Step 4: Get to Work With Your Wand
Use the cleaning wand to reach any places you weren’t able to reach with just your hand.
If you don’t want to buy a window wand, you can always use the back of your hand to reach those hard-to-reach areas of interior windows.
Step 5: Spot Clean
Similar to the outside of the glass, use the distilled water and your magic eraser to find any lingering dirty or greasy spots and wipe them off.
Use caution with any tinted glass. A lighter touch is needed to avoid removing the tint, and vigorous wiping may damage the film.
Step 6: Wipe Dry
Use the opposite side of the microfiber cloth used with the cleaning solution to wipe dry any remaining water spots to make sure you get a streak-free finish.
Step 7: Finishing Touches
Before you finish, make sure to roll your window down slightly to take care of the part of the glass that sits in the window gasket as dirt and grime build up thicker and quicker where the window seals.
Why Should I Clean My Car Windows?
Cleaning your windows seems so tedious, and it really can feel like just another chore you have to do. Why should you bother? You can still see pretty well out of your windshield, right?
Well, there are plenty of good reasons to keep your car windows clean. Let’s take a look at those now.
Incomplete Cleaning Job
Clean windows make the whole car look better. It’s always nice to have a clean car, but seeing a spotless car with dirty windows makes the job look incomplete.
Cleaning your upholstery and making sure your car leather seats are looking their finest won’t be enough on its own.
Everything you do says something about who you are. Even the cleanliness of the auto glass makes a statement about the person behind the wheels.
Visibility Difficulty
The most obvious reason to clean your car windows is that they get dirty, and dirt reduces visibility. Not only does dirt reduce visibility, but smears and smudges can be a real distraction to the driver.
Dirty windows can enhance or even cause road glare. Road glare occurs when the sun shines in such a way that it covers the entire windshield with a bright light or “glare,” making your surroundings largely indistinguishable.
The Automobile Association in the United Kingdom reports that about 3000 accidents and 36 deaths per year are caused by road glare. This is by far the most important reason to wash your vehicle’s windows.
The biggest cause of glare is the road grime from salt and rain that get onto your windows. Although road glare is not 100% preventable, its risks may be reduced by cleaning your car windows on a regular basis. Regular cleaning, therefore, may literally save your life.
Offgassing
Offgassing is when chemicals and other compounds are slowly released from the materials used to make the products we use on a daily basis. This includes auto glass.
It is what causes the hazy layer of film that you often see on the inside of your car windows. Even though you may keep the rest of your interior spotless, your windows can’t be left unattended.
How Often Should I Clean My Car Windows?
This is a personal preference for the most part, but just remember that sometimes, your car’s windscreen washer fluid alone won’t cut it. We recommend a good, thorough cleaning of all the windows in your vehicle at least once a month.
Of course, some factors may dictate the need to wash your car’s windows either a little more or a little less often.
If any window becomes hard to see through, or you can see obvious smudges and streaks, it’s time for a clean. If that hazy look doesn’t go away, even after turning on your defroster, it’s definitely time for a clean.
A smudge or smear here and there may not seem like a big deal, and just one or two may not be, but it is always better to be safe than sorry. Getting rid of that spot now will ensure that you will always be doing your best to stay safe, and it will make cleaning easier for yourself later.
Finally, if you use a car cover, or even just a windshield cover, it can extend the time needed between cleaning at least your windscreen, but maybe all windows if you have your full vehicle covered.
Are There Any Other Tips Or Tricks You Have For Me?
There are always some extra things you can do to make sure you get the most out of your hard work.
- Don’t use paper towels or rags in place of a microfiber cloth. A microfiber cloth will always be the best option because it can soak up excess water better, it won’t leave scratches, and it will pick up any extra dirt rather than simply moving it from side to side.
- Not all microfiber cloths are created equally. We recommend using one with a GSM of between 300 and 400. GSM is the measure of how soft the cloth is, and using one that is either too coarse or too soft will provide less-than-ideal results.
- When cleaning the edge of any window where the rubber gasket meets the glass, use one part of your cloth to clean the edges of the window and fold the cloth over to clean the rest of the window. Using a clean portion of the cloth prevents dirt and bits of the gasket material to be re-applied to a clean window.
- If you clean your side windows right after you clean your car, make sure not to roll them down until your vehicle is dry. The gaskets that prevent water from getting inside your doors usually take longer to dry and can leave streaks on your glass windows if they are still damp from the wash.
- If possible, use warm water. Warm water does a better job at breaking down dirt.
- When wiping and scrubbing a window, don’t use a circular wiping motion. A side-to-side and up-and-down wipe ensures the entirety of the glass will be cleaned the best. It also allows easier access to the corners and sides of the window closest to the gaskets where dirt buildup is more likely.
Wrapping It Up
If you’re one of those people who appreciate a clean car, you’re already one step ahead of everyone else.
Window cleanliness isn’t just about making your car look good, though. It’s also about keeping you and everyone else on the road as safe as possible.
Dirt and grime are everywhere, especially outside. Driving through all of it is just something that everyone has to deal with every day. Preventing road glare and dirt buildup on your auto glass is just one step that you can take to make yourself and everyone else on the road just a little safer.


