There are many aspects of vehicle maintenance.
There are obligatory things that have to be done on a regular basis, like oil changes and checking your tire pressure.
Other tasks aren’t necessary but are recommended to keep your car in good shape, such as applying a good paint sealant every so often to preserve the exterior.
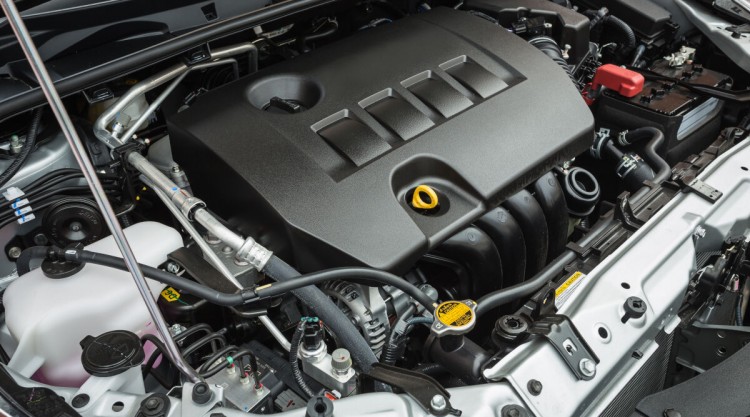
Other jobs fall under the category of being, for the most part, voluntary choices. They can be beneficial to perform under certain circumstances. Cleaning an engine bay is one such task.
In this article, you’ll learn how to clean engine bay areas on all types of vehicles, as well as when and why you might want to make the effort to do so. We’ve also answered whether spraying water into the bay is safe and what precautions to take when doing so. Our step-by-step instructions cover every step from preparation to drying things when you’re done.
Contents (Jump to Topic)
- 1 Key Takeaways
- 2 How to Clean an Engine Bay – From Start to Finish, With Safety in Mind
- 2.1 1. Choosing Where You’ll Be Working
- 2.2 2. Let Engine Cool Before Starting
- 2.3 3. Check Caps, Lids, and Dipsticks Are Tight
- 2.4 4. Remove Battery (If You Can)
- 2.5 5. Cover the Components
- 2.6 6. Prepare Safety Equipment and Supplies
- 2.7 7. Brush and Vacuum Loose Dust and Dirt
- 2.8 8. Wet Engine Bay Before Applying Cleaning Products
- 2.9 9. Apply Cleaning Product or Degreaser
- 2.10 10. Use Your Car Shampoo
- 2.11 11. Final Dry Off
- 2.12 12. Apply Sealant or Polishing Products
- 2.13 13. Replace or Reconnect Battery and Remove Anything Used to Cover Components
- 2.14 14. Start Engine to Dry It Thoroughly
- 3 Why Clean Your Engine Bay? What Are the Benefits?
- 4 Can You Spray Water Into an Engine Bay?
- 5 Final Thoughts
Key Takeaways
- Need Motivation? – Cleaning your engine bay can improve your car’s performance and boost its resale value.
- Safety First! – When carrying out this task, make sure you wear suitable protective gear and cover all components that should not get wet with plastic bags, tape, or Saran wrap.
- Easy Does It – While you can spray water into your engine bay, it’s essential to use only a low-pressure spray to avoid damaging or dislodging parts in the bay.
Skill Level: Beginner.
Time to Complete: 30 minutes to 1 hour, depending on the size and condition of the bay.
Tools Needed:
- Rubber gloves, safety glasses or goggles, and mask.
- Engine degreaser or engine cleaner.
- Engine bay sealant or polishing products (optional).
- Shop vacuum.
- Plastic bags.
- Cling film.
- Masking tape.
- Car shampoo.
- Bucket.
- Spray bottle.
- A pressure washer for cars or garden hose.
- Sweep brush.
- Wash brush with soft bristles.
- Car wash mitt or sponge. (Check out our guide for the best car wash mitts)
- Shop towels or clean rags.
- Large drip pan and absorbent pads.
- Leaf blower or hair dryer.
How to Clean an Engine Bay – From Start to Finish, With Safety in Mind
1. Choosing Where You’ll Be Working
Road grime, dust, or oil residue from your engine can make a real mess of your driveway, roadside, or wherever it is you’re working, so choose your workspace with care.
If you’re renting a space to work in for the day or doing it at a self-serve car wash, you probably won’t need a drip pan. The floor will have built-in drains for toxic waste. You won’t have this advantage if you’re parked on your driveway or street.
Runoff that’s contaminated with oil, fuel, or coolant is an environmental hazard. You can’t allow it to puddle on the street or get into storm drains. This is considered polluting as it can degrade local water quality. In lakes or streams, this toxic waste can affect local wildlife.
Make sure you carry out this job in a well-ventilated area because both your cleaner and contaminants in the bay may cause irritation otherwise.
Finally, a gloomy day or at twilight isn’t the right time to get started. You need to be able to see what you’re doing as you wash. If not, you could accidentally wet coverings or leave some areas dirty.
2. Let Engine Cool Before Starting
Your engine has to be completely cool before you begin the cleaning process. This is partially for your own safety to prevent burns but heated engine components also won’t appreciate being sprayed with cold water and could be damaged.
3. Check Caps, Lids, and Dipsticks Are Tight
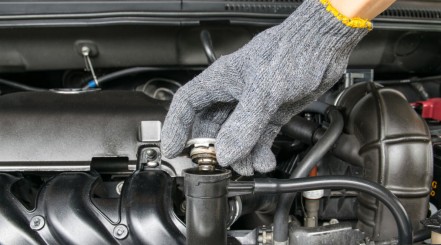
Check that caps, lids, and dipsticks are secure. Ensure reservoir lids for the coolant and brake fluid are fitted tightly.
Give caps a twist to be sure nothing is loose. It’s imperative that water and cleaning products don’t enter into any of these places. You don’t want these fluids circulating inside your vehicle.
4. Remove Battery (If You Can)
Beginners are welcome to skip ahead to the next step. There’s nothing wrong with keeping your battery in so long as you cover it properly.
If you want a 100 percent guarantee it won’t get wet, take it out. This is how to do it:
- Get your socket wrench out and put your gloves on. Attach the socket that fits the nuts on your battery to it.
- Disconnect the negative terminal. This can be identified by the minus sign near the cap. Use your socket wrench to loosen it. It’s essential to disconnect the negative terminal before the positive one. This eliminates the chances of arcs occurring. Once loose, move the negative connector to the side so it can’t make contact with the terminal.
- Repeat the same process for the positive terminal. Take care to position the connector away from the terminal and metal surfaces as the connector will carry a residual charge.
- Unscrew the brackets, the components that hold your battery to the tray.
- Lift the battery out, taking care not to hurt yourself as the unit can weigh 30 pounds or more. Avoid letting the battery hit or scrape against other parts of the vehicle. Store the battery in a safe location away from direct sunlight.
5. Cover the Components
You can’t dismantle every component that shouldn’t get wet. They’ll have to be covered with plastic bags or cling film.
If you’re using old bags, check them for holes. A tattered or torn bag will defeat the purpose.
Driving around with plastic still floating around your motor can be disastrous. If you’re forgetful, make a list of every component you covered. This way, once you’re done you’ll know how many coverings to take out. The components that you’ll need to cover are:
- Caps and dipsticks
- Battery (if not removed)
- Electronic mechanisms – Use your cling film, tape, and plastic bags to cover the spark plugs, alternator, ignition coils, fuse box, and any other exposed, sensitive electrical components (e.g. connectors and plugs).
- Air Filter
Older cars and modified vehicles may have additional components that need covering. Examples include carburetors, which almost all modern engines are built without, distributors, electrical connections, etc. The same applies for turbocharged or supercharged motors. Cover all modified, water-sensitive parts as needed.
6. Prepare Safety Equipment and Supplies
Set up your work area and have all your supplies at the ready. After this, the real work will begin.
Make sure you put on your goggles and gloves, have all supplies (degreaser, scrub brush, car soap) close to hand, and place your drainage pan, with the absorbent pads inside it, squarely underneath the car’s engine bay. Place your pads evenly throughout it.
7. Brush and Vacuum Loose Dust and Dirt
Make things easier for your degreasing product by clearing out as much dirt as you can before applying it. Pick out larger bits of debris, like twigs or leaves, sweep over the motor and sides of the bay, and vacuum exposed surfaces with a slim nozzle attachment.
8. Wet Engine Bay Before Applying Cleaning Products
A preliminary rinse of the engine bay will take off the layers of loose dirt, dust, and grime you didn’t catch.
If using a pressure washer, double-check that the pressure is at the lowest setting. If not, you’ll be surprised by a powerful jet of water.
Rinse the entire engine bay, avoiding the parts you covered. Try to avoid wetting wires more than you absolutely have to.
9. Apply Cleaning Product or Degreaser
Take out your cleaning product or degreaser. This substance is going to do the bulk of the hard work for you.
If the product doesn’t already come as a spray, putting it into a spray bottle will make application easier.
Read the instructions for the product you chose before you attempt to clean your car’s engine bay. You may have to dilute it with water first or shake the canister for a little while.
Coat all exposed surfaces liberally with the degreaser, using a little extra on the valve cover, which is usually in the worst shape. Start from the bottom up so you don’t accidentally rub the product off as you’re applying it.
Don’t forget to cover:
- The engine itself.
- Master cylinder.
- Radiator.
- Air conditioner.
- Oil pan.
- Power steering pump.
- Water pump.
- Windshield wiper fluid reservoir.
- Coolant reservoir.
- The firewall, sides, and front of the bay.
Use your soft-bristled scrub brush to distribute the degreaser and scrub stubborn grease. Do so gently, as you don’t want to scratch anything.
Give the degreasing product time to work its magic. Usually, you’ll have to give it between 5 and 10 minutes. Once enough time has passed, rinse the product off. Pass the hose or pressure washer evenly over the area until all traces of product and dirt is removed.
One application may not cut through years or thousands of miles worth of grime. If the bay is still looking rough, repeat the process.
10. Use Your Car Shampoo
Car shampoo is the final touch to clear off the remaining residue. If you happen to have a foam cannon at home, this is a good time to use it.
Start by diluting your car shampoo in water, mixing the two in your bucket. If you have a car cleaning foam cannon, fill up the canister. Soap up all the exposed surfaces using your car wash mitt or sponge. Try to wring the mitt or sponge out so that it isn’t soaking wet.
Use your discretion when you decide how hard to scrub. Rubber hoses should be done with a lighter touch than the walls of the bay. When done, rinse thoroughly.
11. Final Dry Off
Now that everything is pristine, you need to dry the engine compartment out.
Wipe down everything you can reach with your towels or rags to dry off excess water. After that, a hair dryer or a leaf blower set to low will dispel residual water. Pass your tool of choice all over the compartment, repeating if necessary.
If you have a compressed air tool, this will save you a lot of time and effort.
12. Apply Sealant or Polishing Products
As an extra touch, you can apply a sealant to the bay to protect it and keep it cleaner for longer.
There are also polishing products for metals and plastics that will get internal mechanisms gleaming. If you choose to use these, make sure to follow any product instructions!
13. Replace or Reconnect Battery and Remove Anything Used to Cover Components
Now that the bay looks good, it’s time to return it to a functioning state.
Take off all bags, cling film, and tape. If you made a list of what you covered earlier, consult it now. If you removed it, bring the battery back and set it into the tray. Screw the brackets back on and reconnect the battery terminals. Always begin with the negative terminal, even when reconnecting. Batteries that weren’t removed only have to be reconnected.
14. Start Engine to Dry It Thoroughly
You can now safely switch on your engine. Let your vehicle idle for ten to fifteen minutes so that any damp patches evaporate. Once dry, your engine bay cleaning is complete!
Why Clean Your Engine Bay? What Are the Benefits?
Now we know how to clean an engine bay, let’s have a quick look at the benefits of doing so.
Improve Performance
Getting rid of layers of gunk and filth can help to keep your motor running cooler.
Enough dirt buildup can increase operating temperatures, which lessens the overall performance of your engine.
After Repairing a Leak
As much as we don’t want them to, leaks happen. Coolant, oil, power steering fluid, and even fuel can spread to unlikely places.
Once the breach is repaired, you may want to properly clean the residue out of your motor. Splashes of these engine fluids can heat up and vaporize when you’re running your vehicle.
The smell of burning oil, gasoline, or coolant isn’t pleasant. These fumes can also be toxic. For example, antifreeze vapor can irritate your respiratory tract, skin, and eyes. Inhaling gasoline can cause headaches and dizziness. These aren’t ideal conditions to be operating a car.
On a less serious note, these sticky substances can attract grime. Dust and other debris can build up at the site of the puddles.
Preparing to Sell
When you sell your car, you want to present it in the best possible light. It’s only natural that a potential buyer will want to look under the hood.
If the vehicle’s engine bay is filthy and greasy, it will be hard to inspect. That also won’t give a good impression; the buyer might suspect a leak or even feel that the vehicle hasn’t been looked after properly.
Performing a Deep Clean
You may be planning to give your car a hood-to-grille cleaning. Why neglect the engine compartment?
You can enjoy the satisfaction of knowing the entire vehicle is spotless inside and out. If you’ve already set time aside for this, an extra hour for the bay won’t hurt.
Can You Spray Water Into an Engine Bay?
The answer is yes, but with a few constraints. As long as you keep these in mind, you shouldn’t have any trouble.
Avoid High Pressure
If your vehicle were human, the engine bay would be where all vital organs are located. A gentle approach is critical for a successful, damage-free cleaning.
Those of you with pressure washers, forget about higher settings when cleaning your engine. High-pressure streams may do a better job at removing filth, but can also be destructive. Powerful water pressure can dislodge parts from the bay, posing a safety risk and causing damage.
If you have a garden hose, you don’t need to twist the knob to the maximum. A steady, low-pressure spray will suffice.
Don’t Flood Anything
Make sure to keep your hose or pressure washer moving while you’re spraying water. Don’t drift off into your thoughts and aim the nozzle at one spot for too long as this may cause flooding.
Be Careful to Shield Vulnerable Parts
Some engine components should stay dry during the process. You have to take the time to cover them before you begin. With these parts shielded, you can spray water without worry.
This includes any exposed electrical parts and any holes or crevices where water may be able to get in.
Spread Out Your Cleanings
This isn’t a chore you should do frequently, even if you enjoy it. Regularly spraying your motor with water—say, every week—can lead to corrosion.
Once or twice a year is fine for the majority of vehicles. You can also wash it after the discovery and repair of a moderate to severe leak.
Final Thoughts
You might not be able to appreciate the results of cleaning your engine bay the same way as with an exterior wash. Still, you can have the satisfaction of knowing your car’s engine bay is immaculate.
Learning how to clean an engine bay is a practical skill to have. You can prepare your vehicle if you need to sell it, or wash the bay of a secondhand purchase.
Keeping your engine bay clean will also improve lifespan and performance. Nasty debris won’t have a chance to cause corrosion or build-up and provoke overheating.
Do you have any questions for us? Have you made any mistakes or successfully cleaned an engine bay before? Please let us know in the comments section below.


