Flushing out your vehicle’s cooling system is one of those chores that may seem intimidating at first. You have to get up close and personal with your car’s inner workings, and it’s way more technical than patching up a windshield crack or changing a tire.
That being said, it’s always good to learn automotive maintenance tasks that have to be repeated so you can save on paying a professional.
In this article, we’re going to teach you exactly how to flush a radiator. You’ll learn what tools and equipment you’ll need, as well as essential safety precautions you should take throughout the process.
We’ve covered the whole operation, step-by-step, from beginning to end. If you’re eager to get started, read on.
Key Takeaways
- Why Do It? – Keeping your radiator clean is an essential maintenance task. If overlooked, you run the risk of your engine overheating, which in turn can lead to very serious (and costly) issues.
- Wear PPE – Flushing the radiator in your vehicle involves coming into close contact with toxic substances, so be sure to wear protective gear and work in a well-ventilated area.
- Necessary With Stop-Leak Products – Many radiator stop-leak products require that you flush your system before using them.
Contents (Jump to Topic)
Skill Level: Moderate.
Time to Complete: Approximately three to five hours (exact time will vary depending on vehicle and flush product used).
Tools Needed:
- Safety gear: Goggles, gloves, and mask.
- Drain pan or drain bucket. Check your vehicle’s coolant system capacity to know the size you’ll need.
- Multiple large jugs or plastic containers for flushed fluid.
- Funnel and hose (optional).
- Water source (e.g. garden hose).
- A jack to raise the vehicle off the ground (any of the many types of jacks will suffice.)
- Jack stands to hold you vehicle up safely.
- Wrench or screwdriver (this will depend on your drain plug or radiator screw. Check your owner’s manual to learn which one you’ll need).
- Distilled water.
- Flush product.
- New antifreeze or coolant.
- Rags for cleaning the ground.
First Things First: Safety!
When flushing your cooling system, you’re going to be dealing with toxic chemicals that can be dangerous if mishandled. We’re not saying this to scare you. With the right equipment and level of caution, you can eliminate any potential risk of injury.
Handle Carefully
Be sure to keep your mask, gloves, and goggles on while you’re in direct contact with any chemicals.
Inhaling vapors from antifreeze can irritate your sinuses and respiratory tract. The chemicals can also irritate if you accidentally get any on your skin or in your eyes.
Protect Children and Animals
Antifreeze is neon-colored and has a sweetish odor. These qualities may attract vulnerable family members like your children and pets. Wildlife can also walk through these puddles or ingest them.
Ensure that you store unused chemicals out of reach of curious hands (or paws). If you spill chemicals on the ground, do your best to clean them up.
Don’t Forget to Ventilate
If you’re in your garage, keep the door open to encourage ventilation. You’ll have to idle your engine more than once, and this should never be done indoors. You also want to have fresh air circulating when you’re working with chemicals. We recommend doing this work outdoors, for maximum air circulation.
Correct Disposal
Getting rid of chemicals flushed from your radiator system the wrong way is not only dangerous but may be illegal. Consult your mechanic or local government site about regulations for coolant and flush product disposal.
You can also call your public works department or sewage treatment plant. Certain types of antifreeze can be recycled—make sure you ask about that too.
Proper disposal of radiator fluid will protect you from potential fines, and of course, will help protect the environment.
How to Flush Your Car Radiator
The whole operation can be separated into five distinct steps. You’ll start by draining the old coolant. Then, you’re going to use your radiator flush product.
Thirdly, you’ll drain the flush product, leaving your system nice and clean. All that’s left is to add new antifreeze and dispose of all the chemicals. Don’t worry—this is just a brief overview of what’s to come. We’ve provided detailed guidelines for each of these five steps.
Step 1: Drain Old Coolant
Get all your tools and safety gear at the ready. Let’s start by getting rid of the nasty old coolant.
Park Your Car
Pick a place to park your car where you can stay comfortable for the next few hours. It should be somewhere flat – inclines, hills, or rocky surfaces must be avoided. You want to keep the chances of spilling anything as low as possible.
Try to choose somewhere that’s sheltered. If this isn’t possible, choose a shady spot. You don’t want to be working in direct sunlight with chemicals for hours. Remember that if you do this in your garage, be sure to keep the door open for ventilation.
Allow Engine to Cool
If you’ve driven a while to get to your work area, let your engine cool down before you get started. Your antifreeze will be boiling hot—you don’t want to have it flooding out in that state.
Jack Your Car up and Place Jack Stands
Lift your car up to a level where you won’t have to struggle to get underneath. Don’t exaggerate though: you don’t want your grille pointing straight up to the sky.
Once raised, use jack stands. Never work under your car supported only by a jack, it’s not safe.
Remove Radiator Cap & Position Drain Pan or Funnel and Hose
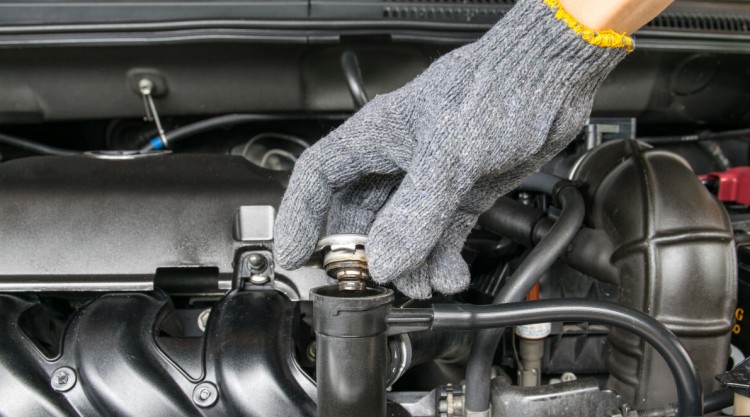
Open the hood of your car, and remove the radiator pressure cap on the top of your radiator. Be sure to put it somewhere safe, so you have it when it’s time to close it again.
Set your pan underneath the drain plug. Alternatively, you can use a funnel with a hose. Pick the method that’s preferable for you.
Open Radiator Drain Plug or Valve & Allow All Liquid to Drain
If you’re not sure where this plug is, check your car’s owner manual. Use your screwdriver or wrench to open it up.
Drain the coolant, making sure to let all the old coolant run out. Remember that you should be aware of your system capacity, e.g., 12 quarts, and have a drain pan or containers large enough to hold that amount of liquid.
The drained liquid should be approximately the same quantity as your vehicle’s rated capacity.
Transfer the used antifreeze to your old jugs or containers. Seal them tightly and keep them off to the side.
Step 2: Use ‘Radiator Flush Product’
Prepare your radiator flush product and have it close by, ready to add soon.
Close Radiator Drain Valve & Set Your Car Down
Close up the valve with your wrench or screwdriver, making sure it’s tight.
Get your vehicle back on level ground. Your car doesn’t need to be raised for this step.
Add Flush Product, Top Up With Water, Then Run Engine
Apply the product, as directed in the instructions, to your radiator or coolant reservoir.
Top the chemical off with distilled water and reapply your radiator cap. Then close the hood of your car.
Run your car’s engine for as long as specified by the product guidelines. You may have to open your heater control valve manually as well.
Step 3: Drain Flush Product
Now that the product has served its intended purpose, it’s time to clear it out.
Draining the flush product works the same way as draining the old antifreeze. So this is going to be similar to the first steps.
Allow Engine to Cool
Give your engine (and the flush substance) time to cool down. Take this opportunity for a break.
As a gentle reminder, be sure to put all your safety gear back on when the break time is over.
Remove Radiator Cap & Jack Your Car up
Take off the cap for the second time. And again, put it somewhere safe and easy to find.
Lift your car up with your jack, and then place back on jack stands – you’re going to be back under it again shortly.
Position Drain Pan or Funnel and Hose & Open Radiator Drain Plug
Position your pan (or your funnel) underneath the plug.
Open the plug with your screwdriver or wrench, remove the radiator hose, and begin draining the radiator.
Let the mix of flush product and distilled water flow out. As with the antifreeze, you should get roughly the same amount flowing out as you put in.
Move the mixture over to your jugs or containers. Close them securely and place them with your old coolant. You’ll be disposing of all of these containers later.
Step 4: Flush With Water
You’ll have to flush the radiator and coolant system at least one more time with plain water. This is to ensure there’s no residue of flush product or other contaminants left inside.
Follow these instructions:
- Close the drain valve.
- Set the car down and put the jack to one side.
- Refill the radiator with water.
- Replace the radiator cap and close the hood.
- Run the engine for five to 15 minutes.
- Now wait until the engine has cooled.
- Pop your hood and remove the cap.
- Lift your car with the jack.
- Position the drain pan or funnel and hose.
- Open the drain valve.
- Let all liquid drain out.
- Collect the liquid in your containers.
Repeat this procedure until the water runs clear. How many times you need to do this will depend on how dirty your coolant system was. You shouldn’t see any traces of dirt, the flush product, or old antifreeze in your drain pan.
Once the water runs clear, repeat the process one last time with distilled water. Tap water can contain corrosive compounds (e.g. certain metals) that you don’t want circulating in your vehicle. A final flush with distilled water should be enough to clear these out.
Step 5: Refill With Fresh Coolant
Once you’ve reached this step, you’re nearly finished: the hardest part is over and done with. The last thing you’ll be doing for your car is to replace the coolant.
Close Radiator Drain Plug
Securely tighten and close your drain plug. This is the last time you’ll be doing this, so make sure it isn’t loose.
Lower the Car
For the final time, lower the vehicle back down to the ground.
Fill With Coolant, Close Radiator Cap, and Check
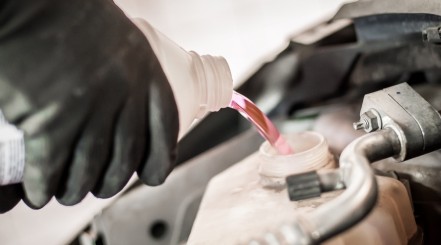
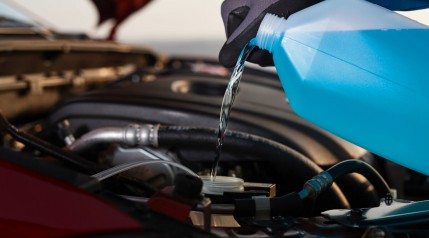
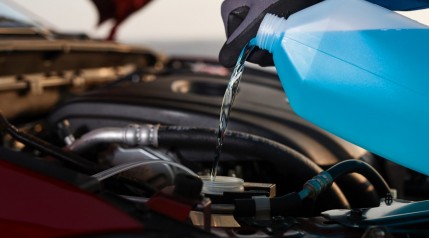
Fill your radiator or coolant reservoir with the necessary quantity of antifreeze.
Follow the instructions for the specific brand you’ve bought. For example, some come pre-diluted, and others may require you to add distilled water to the expansion tank.
Put the cap back where it belongs and then turn your heating system back on to double-check everything is working as it should.
Disposal and Clean-Up
Collect all your containers of drained liquid. Take them to an appropriate facility in your area for disposal.
Inspect your workplace for puddles or drips. If you find any, wipe them up with paper towels or rags and rinse with clean water.
Why Flush a Radiator or Coolant System? When Is It Necessary?
It’s necessary to perform a radiator flush every so often. Your owner’s manual should tell you (in miles or years) how often this is.
Every 60,000 miles is a decent interval for most cars. Note that this may not apply to older automobiles or vehicles with existing problems (e.g. corrosion or leaks).
There are two good reasons to flush your radiator:
- Flushing your cooling system is a part of the standard maintenance practices that keep your engine running smoothly.
Your cooling system (hoses, pump, heater core) circulates coolant around your engine. If this process fails for any reason, your engine may overheat, and an overheated engine can cause a blown head gasket or cracked engine block.
- Secondly, a coolant flush might be required if you’re using a stop-leak product.
Required Maintenance
Just like motor oil and gasoline, antifreeze is not immune to aging. The liquid collects grit, metal particles, and other contaminants as it circulates. This sort of debris will cause the coolant to break down with time. It can form acids that can lead to corrosion.
When the product is past its prime, it won’t keep things cool as effectively as when it is new. This means your engine is more likely to overheat. In turn, moving parts will be subjected to greater wear and tear. Failing to replace it can lead to damaged parts for your car and hassles down the road for you.
Simply draining it and adding new coolant isn’t wise. Leftover residue can still have harmful effects. Thorough flushing will help to get rid of any remaining elements. It can also clear out sediment buildup which can result in blockages.
Seal Leaks
Certain radiator stop-leak products require that you flush your system before using them. They may not be compatible with your current antifreeze. Some brands are more likely to clog up a dirty system.
You can check out our guide to the best radiator stop leak products to ensure you buy the best and right one for you.
Final Thoughts
A cleaned-out coolant system has a range of benefits. Your engine will run cooler, and you’ll improve the overall lifespan of your radiator and related components.
Additionally, that’s one less maintenance issue for you to pay your mechanic to handle, and you can also enjoy the satisfaction of having learned something new.
Do you have any questions, feedback, or tips to add? Please share your thoughts in the comments below. We’ll reply to each one!

