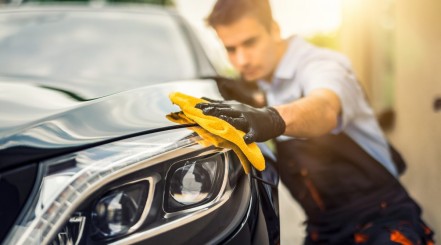
As car owners, we all have to do our part to reduce air pollution. For the most part, this involves maintaining the components in our vehicles that control pollutants, of which the most important is the catalytic converter.
In this article, we’re going to teach you how to clean a catalytic converter, both with and without removing it.
We also explain why it’s beneficial to clean it and what you need to know before you get started. That includes which methods aren’t advisable and why.
Key Takeaways
- Why Do It? – Failing to clean your catalytic converter can make your vehicle illegal to drive and result in a drop in performance and/or overheating.
- Two Methods – You can clean your catalytic with or without removing it. If it’s welded rather than bolted on, we recommend leaving the job to a mechanic if you need to remove it.
- Methods to Avoid – Contrary to some rogue advice you might find online, it’s never a good idea to add paint lacquer or thinner to your fuel tank to clean a catalytic converter, soak the unit in strong chemicals, or saw it off if it’s welded on.
How to Clean a Catalytic Converter Without Removal: Using a Catalytic Converter Cleaner
This is the simplest way to clear up deposits and get your emissions back to normal. A bonus is that catalytic converter cleaners can also work on your fuel system and oxygen sensors.
Equipment Needed
- Catalytic converter cleaner.
- Fuel (either access to a gas station or fuel can).
Step-by-Step Process
Step 1: Ensure Product is Compatible
Some catalytic converter detergents are only compatible with diesel or gasoline, not both. Read the label before you buy it to make sure it’s appropriate for your vehicle.
Step 2: Buy Enough for Treatment
Bigger cars will require higher doses of your chosen product. Check that the quantity you’re buying is enough for your automobile.
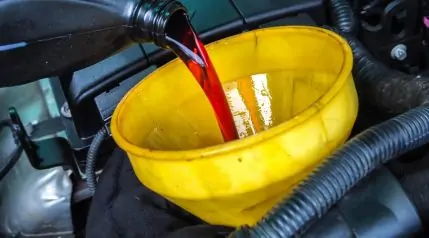
Step 3: Apply to Tank as Directed
Pour the directed amount of product directly into your gas tank. You may have to have a near-empty tank, depending on the brand of cleaner.
Step 4: Drive as Needed
Start your engine up and go for a drive to circulate the detergent. Review the guidelines to know how far or for how long you should drive.
If it worked, there will be a noticeable improvement. Symptoms like engine misfires, smoky exhaust, and sluggish acceleration should have improved.
Cleaning a Catalytic Converter by Removing and Soaking It
We suggest that only intermediate to advanced home mechanics try removal. If a cleaner didn’t work, the catalytic converter might be severely clogged.
If this tactic isn’t effective either, you’ll have to pay for a replacement. Driving without these pollution-controlling components is irresponsible and illegal in many states.
Equipment Needed
- Gloves.
- Safety goggles.
- Large container or tub.
- Automotive degreaser.
- Penetrating oil (e.g. WD-40).
- Jack and jack stands.
- Wrench (check bolt size in vehicle owner’s manual or online).
- Oxygen sensor wrench.
- Shop towels.
- Pressure washer.
Step-by-Step Process
Here’s a breakdown of what you’ll be doing:
Step 1: Let Vehicle Cool Down
The exhaust pipe and related components run hot: the converter alone can get as high as 750 degrees Fahrenheit based on speed and driving conditions. Ready your supplies while your car cools off completely.
Step 2: Jack Your Car Up
Jack your car up so that you can comfortably position yourself underneath the exhaust. Use your jack stands to keep it secure. (We have guides for how to use a bottle jack, a floor jack, and a scissor jack.)
Step 3: Wear Goggles and Gloves
Protect your eyes from falling debris and your hands from getting filthy.
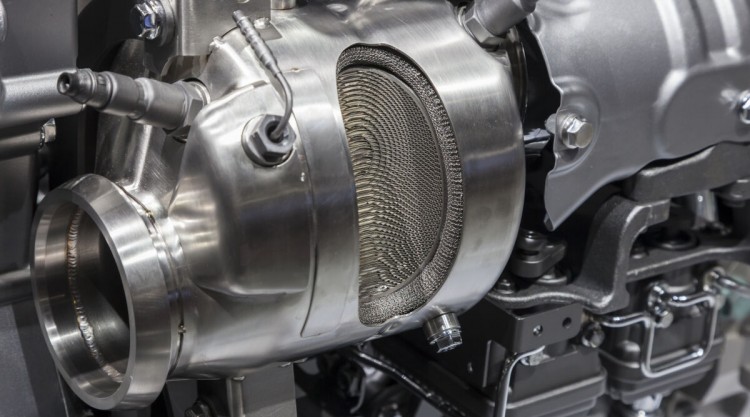
Step 4: Locate the Converter
The unit will be somewhere toward the middle or end of your exhaust pipes. It will be in the form of a rounded or squared device—hard to miss.
Step 5: Examine the Fit
Is the unit welded or bolted on? Remember that welding is best handled by a professional mechanic.
Step 6: Remove Oxygen Sensor
Using your oxygen sensor wrench, carefully remove the sensor (or sensors) and set it aside.
Step 7: Treat Bolts With Penetrating Oil
Liberally apply penetrating oil to all the bolts. They’re probably fixed on tightly or partially corroded. Let the oil loosen them up for a couple of minutes.
Step 8: Loosen Bolts, Back To Front
Start with the bolt closest to the end of your exhaust. Work your way forward from there. Don’t remove them just yet.
Step 9: Remove Bolts While Supporting Converter
Hold on to the unit so that it doesn’t drop to the ground. Remove each bolt, setting them to the side so you don’t lose them.
Step 10: Inspect the Unit
Is it melted, or do you hear rattling when you shake it? These are indicators that the component is done for and must be disposed of.
You don’t have any other choice here but to get a replacement. Until it’s replaced, your car shouldn’t be driven anywhere but to your mechanic.
If everything looks to be in order, wipe the unit down with a shop towel to remove surface residue.
Step 11: Pressure Wash: Low Pressure Only!
Set your pressure washer to low. Hose down both the inlet and outlet pipes to clear out deposits and nasty crud.
Step 12: Prepare Solution & Let It Soak
Fill your container up with hot water and add the degreaser to the water.
Step 13: Let It Soak
Place the unit into your pre-prepared solution. Leave it to soak for 30 minutes to an hour—you don’t want to overdo it.
Step 14: Rinse, Dry, and Reinstall
Rinse it off with your pressure washer, keeping it at low pressure. Place the unit on a shop towel and give it time to dry off completely. The safest bet is to leave it for at least a few hours, but the longer you can wait the better.
Once it’s completely dry, collect your bolts. Reattach the component and your oxygen sensor (or sensors) too.
Step 15: Go for a Drive
Drive around for a while to see if there’s any difference. If nothing or little has changed, a replacement is in order.
What Is a Catalytic Converter and Why Should You Clean It?
Emissions and fuel standards set by the Environmental Protection Agency (EPA) for vehicles with internal combustion engines are strict, and rightly so. Transportation, in general, is a significant source of pollution in the world today.
The catalytic converter works to reduce harmful emissions from your vehicle’s exhaust system. Inside its insulated chamber are either pellets or a structure that resembles a honeycomb. These are coated with what’s known as a catalyst.
Catalysts are any substance that can enhance a chemical reaction while remaining intact. In this process, they’re typically noble or precious metals such as platinum.
Noxious compounds in your exhaust smoke, like carbon monoxide and hydrocarbons, are oxidized. They emerge as carbon dioxide and water vapor, respectively. Harmful nitrogen oxides end up reduced into oxygen and nitrogen.
So the net result is that noxious gasses and substances are converted into far less harmful ones as they pass through the catalytic converter.
Why Should You Occasionally Clean It?
If your car’s catalytic converter is left unclean, the following can occur:
Reduction in Gaseous Control
A clogged catalytic converter won’t be effective at controlling toxic gasses. Your car will be emitting higher levels of emissions, possibly more than the legal level.
Law-Breaking
Smoking exhaust pipes can be a serious offense in some states, and with a faulty or clogged catalytic converter you will not pass the emissions test. In Texas, you can receive a fine of up to 350 dollars.
Performance Drop
Car components are designed to rely on others and work in synch. Because your vehicle’s catalytic converter plays a big role in the combustion process, engine performance and fuel economy will decline if it isn’t looked after.
Damage from Overheating
Overheating is another possible symptom, which can cause damage to other vital mechanisms. In this case, the good ol’ check engine light will warn you that something’s up.
How Can You Tell if the Catalytic Converter Needs Cleaning?
The symptoms associated with a faulty or dirty unit can be indicative of many issues. To be certain, it’s a good idea to consult your onboard diagnostics system (OBD-II).
Once efficiency drops below 50 percent, your check engine light will show up. Use an OBD-II scanner to find out if the catalytic converter could be at fault.
Cleaning Methods to Avoid
Information is abundant online about almost everything. That doesn’t mean they’re all accurate or even safe to attempt. For your vehicle’s sake, and your own, avoid these supposedly effective ways to clean the catalytic converter:
Paint Lacquer or Thinner in Your Fuel Tank
You might have seen guides for running lacquer or paint thinner through your gas tank to unclog a catalytic converter. Solvents are frequently used in the automotive industry, but not in this manner. It’s not wise to use non-specific products, ones that aren’t meant for cars, on your vehicle.
The idea behind this trick is that the solvents in the lacquer or thinner will break down the build-up blocking the converter.
However, products like this are not made to circulate inside a fuel system. They will cause more trouble than they’re worth by causing internal damage. Solutions designated for your catalytic converter or emissions system are a much safer and more effective choice.
Soaking Unit in Strong Chemicals
A harsh detergent, like a grout-eating gel or bleach, may be powerful enough to cut through build-up on the unit. If you leave it to soak, it’s even more likely.
Despite their effectiveness, certain chemicals can be corrosive or acidic. They could interfere with the catalyst or even eat through the exterior.
Sawing Off a Welded Unit
The catalytic converter is either bolted or welded on. If you know what you’re doing and have the tools handy, bolts can be loosened. But, sawing the unit off is a different story. The risk of accidents, both to you and your vehicle, is not worth the effort.
Remember, it will also have to be welded back on afterward. The best approach is to go to a mechanic and have it done for you.
Going to a Professional to Clean Catalytic Converter: What to Expect
You can visit a mechanic or a carbon-cleaning center to get quotes and see what your options are:
Carbon Cleaning Center
These are centers that specialize in cleaning carbon deposits out of car engines. You can take your vehicle to one, they’ll carry out an inspection and then provide a quote.
They use hydrogen to decarbonize the converter, rather than cleaning it as we’ve described. This isn’t something you should attempt at home.
Your Mechanic
Most mechanics will recommend that you use a catalytic converter cleaner or replace it. It’s unlikely they’ll offer to remove and clean the unit.
If all cleaning methods failed, steel yourself for some bad news. Replacements are far from cheap—you can expect to pay a minimum of $1,000.
The cost of labor is less than what you’ll be shelling out for the part itself. This is due to the precious metals within it that serve as catalysts.
How Often Should You Clean Your Catalytic Converter?
Using an appropriate product every so often is more cost-effective than buying a new unit. Aim to do this between three and four times a year for heavily-used vehicles.
Those of you who don’t drive as often can get by with one treatment a year. All you have to do is pour the solution into your gas tank and drive around. Or, get it done professionally at a carbon cleaning center. That’s much easier to do than removing the unit or paying hundreds of dollars for a new one.
Conclusion
We’ve shared how to clean catalytic converters, with and without removal. Still, removing the unit should be a last resort, not the first thing you try.
Cleaning solutions are effective and easier to use. They can extend the lifespan of the converter by ensuring it doesn’t get clogged.
Now that you know how costly replacement can be, make it a priority to look after your converter and your vehicle in general. You want to delay having to buy a new one for as long as possible.
We hope you’ve found this article helpful. Do you have any questions for us? Please leave a comment below so we can get back to you!