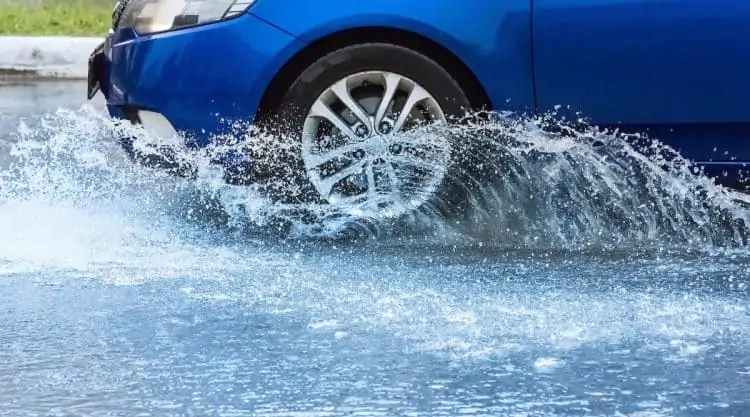
Despite not being toxic or harmful, water leaking in your car is still a sign of an issue and can cause further damage. Wet patches or mold on your upholstery or carpeting can be frustrating to dry and can leave stains. That’s not to mention an unpleasant smell that can develop in your car’s interior over time.
And it could be more challenging to find where it’s coming from than you may expect.
In this article, we’ll share with you everything there is to know about water leaking in cars.
We’ve listed the steps you should take to determine the source, and you’ll also find out all the possible causes and repair solutions for each one.
Key Takeaways
- Multiple Common Causes – The sunroof, faulty door seals, faulty weatherstripping, an incorrectly fitted windshield, a broken air filter, or heater core issues could be causing your leak.
- Where and When? – The first step in finding the source of your leak is identifying where and when it happens.
- The Good News – Most fixes can be done at home if you’re at all car-savvy.
Contents (Jump to Topic)
Diagnosing Water Leaks in Your Car—When Does it Leak?
Successful diagnosis of a water leak requires two steps. The first is identifying when the leaks happen.
When Raining?
A window that’s left cracked open, even slightly, can let in a substantial amount of rain. If everything looks sealed up tight, you’ll have to start checking around.
Are rainy days hitting the inside of your car just as hard as the outside? It could be one of these parts at fault:
- Sunroof drain.
- Door membrane.
- Door weather stripping.
- Windshield rubber.
- Window seal.
- Cabin air filter.
Inspect each of these areas for signs of damage, and moistness on the inside. If you find anything that looks perished or damaged, it’s the likely culprit, and you can then move on to a repair.
When Parked on a Slope?
You might have figured out the leak gets worse or only appears when you park on an incline. If you suspect this happens, but you aren’t sure, test it out.
Find a slope or a steep hill and park your car there for 15–30 minutes. See if the mystery breach acts up or not.
The good news is there won’t be as many parts to check here. The fault is most likely within your sunroof.
In a Car Wash?
The purpose of going through a car wash can start to seem futile with a leak. A sopping wet interior can take away the joys of having a gleaming exterior.
Don’t forget to verify that you didn’t accidentally leave a window or sunroof partially open.
As with rainfall, there are a number of components that could be affected. Review our sections below about the following:
- Sunroof.
- Door seals.
- Door weather stripping.
- Windshield rubber.
- Window seal.
- Cabin filter.
When the AC Is Running?
Cool air shouldn’t come at the cost of unwanted moisture. Those of you living in hot climates may have to sacrifice comfort for a short period to test this theory out.
Attempt to drive around without your AC running for a while. Keep an eye on the places where water accumulates. If you notice improvement, you’re one step closer to solving and fixing the breach.
Dampness, drips or puddles inside your cabin when you’re using the AC could mean there’s a problem with the air conditioning system or heater core.
Windshield Replacement
Professionals can make mistakes every so often. If you’ve recently had a new front or rear windshield installed, it may have been fitted incorrectly.
Wet patches collecting towards the front or rear of your cabin could warn of shoddy installation, so it’s worth checking this out.
Possible Causes of Leaks in Your Car – And How to Fix Them
Next up, you’ll learn how and why each component could be malfunctioning. We’ve included brief guidelines on how to check and fix each of them.
Vehicle Sunroof
Sunroofs are a lot more penetrable than you may think. They do a good job at keeping out solid debris but are less adept at preventing water leaks into your car.
In fact, the roof is built to leak, albeit in a controlled fashion. They’re equipped with drainage tubes that carry excess water from the roof, down, and then off your vehicle.
The drain tube holes are usually located underneath the sunroof itself in a visible metal frame (the “sunroof tray”). If the tubes become clogged, fluid will drain through the sunroof rather than away from it. It could drip down your roof to your dome light, front seats, or carpeting.
This is why parking on a slope at the wrong angle could make it worse. Overflow won’t have the chance to travel down the blocked tubes, so it will seep into your cabin.
To check this, find the entrances and exits to your drainage tubes. The holes are usually located underneath the roof itself. If you open it all the way, you should be able to see them.
Exit portals might be in the driver’s side door jamb or somewhere underneath your vehicle. This information can be found in your car’s owner manual.
Slowly pour a small quantity of water into each of the drain holes. Monitor the exit holes to see how quickly the liquid flows out. If it takes a long time, you’re likely dealing with a blockage.
How Can You Fix It?
You can use an air compressor to clear out whatever is clogging the tube. You may also have to get a flexible wire for thorough cleaning if there’s a lot of dirt.
Door Seals / Door Membrane
Every door in your car contains a membrane. This sheet is made of lightweight, durable materials, such as polythene or foam.
Automotive doors aren’t airtight, meaning water can seep into them. The membrane protects the inner upholstered part from getting wet.
Water runs down the protective sheet and out of holes built into the bottom of the door. If the membrane tears or grows thin with age, it won’t be as effective.
If this happens, you’ll usually find damp spots on your carpeting, in the footwells.
If you suspect this, remove your door panel to check the membrane. If you see any perforations in the door seal, you’ve found where your leak is coming from.
How Can You Fix It?
You can try a temporary fix with waterproof tape, but it’s preferable to have the whole piece replaced.
Door Weatherstripping
The weatherstripping is the rubber seals that surround your doors. If the rubber is brittle, aged, or damaged, it can allow too much water into the door.
Even with a secure membrane, the liquid can overflow from the door into your vehicle. These leaks usually cause dampness in the footwells.
Visually inspecting the seals will tell you all you need to know. Roll your side windows up and down to see if the black rubber is pressed firmly against the glass. If not, a replacement might be in order.
A telltale whistling noise while you’re driving can also suggest old weather stripping.
How Can You Fix It?
Minor wear and tear can be repaired with restorative products for rubber. If the seals are in tatters, you’ll need to replace them to make your door waterproof again.
This video shows you how to fix the vehicle’s weatherstripping at home:
Windshield Weather Stripping
Both your front and rear windshields are fitted with rubber seals that hold them in place. They’re supposed to be a perfect fit. If the windshield wasn’t installed correctly, gaps or crevices could exist between the glass and the rubber. Gaps can also occur if the rubber wears down with age, although this is less common.
Rear windshield leaks are easier to identify. You’ll find dampness in and around the back of your vehicle.
If it’s your front windshield, the liquid may drip down your dashboard towards your radio or pool in the footwells of your front carpets.
How Can You Fix It?
The glass will have to be taken out and refitted properly. The old seals have to be replaced if they’re distorted or damaged.
Leaking Windows
Rainwater can easily sneak in windows if the seals are out of shape.
Each window has rubber fitted against it on either side. When you roll your windows up and down, the glass is pressed between these two seals.
Both seals should be flush against the glass on either side. External conditions, such as extreme cold and exposure to sunlight, cause the rubber to lose its flexibility with time.
Carefully examine the rubber seal around your window. If it’s brittle, inflexible or missing pieces, it’s done for.
How Can You Fix It?
You could try a restorative product first to see if that makes a difference. If that fails, you’ll have to install new seals.
Air Conditioning
The AC in your vehicle pulls warm air out of the cabin and blows in cool air when you drive. If the evaporator drain pan or tube, or both, are dirty, condensation in the warm air gets blocked and fluid could be forced into your cabin. Water will come from your vents, or you may see dampness on the dashboard or passenger side floor mat.
If your car stays dry when you avoid using the AC, you’ll know what’s going on.
Newer automobiles can include sensors to warn you of a blockage in the system. If yours has lit up and you have a leak in your car, the guessing game is over.
For older cars, you’ll have to take a peek at your drain pan and pipe. Consult your vehicle’s owner manual to find out where it is. Debris in the pan could have come from the tube.
How Can You Fix It?
Use a slim bristle brush and wet-dry vacuum to clear out the drain. Make sure to remove any solid muck from the drain pan too.
Heater Core
The heater core is responsible for all the heat-related airflow inside your cabin. It uses coolant to prevent overheating while it heats the air blowing into the vehicle. If one of the tubes that circulate coolant grows loose or damaged, a leak could occur.
If the damp area in your car smells sweet, you’re dealing with a coolant mix from a leaking heater core. The leak may also be accompanied by foggy windows and erratic heating functions. Note that inhaling vapors contaminated by antifreeze can be dangerous too.
How Can You Fix It?
You’ll want to get this repaired as quickly as you can. Either the hoses or the entire heater core will have to be replaced if it’s corroded or malfunctioning.
The heater core is located in the engine compartment, but accessing the unit can be tricky in certain vehicles.
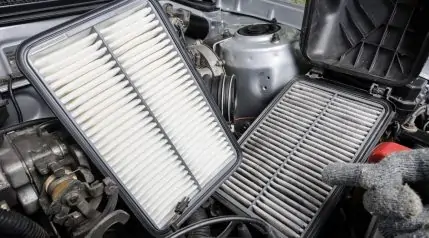
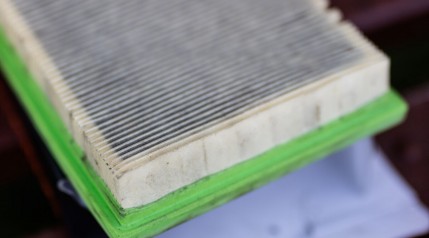
Cabin Air Filter
The cabin air filter shields you and your passengers from air pollution. A broken filter or careless installation could lead to rainwater seeping through the cracks.
Locate and examine the filter. In the majority of cars, you’ll be able to reach it without much trouble. Inspect the filter to see if it’s fitted right and free of cracks or tears. Open and close the lid over it to make sure it catches and stays shut.
How Can You Fix It?
Cabin air filters aren’t that expensive. If yours is damaged, throw it out and buy a new one. Those of you with badly-fitting units, double-check your car’s specifications before buying a replacement.
A broken lid may pose more of a challenge. You’ll want to repair whatever mechanism is preventing it from closing. You can also try a temporary DIY fix like taping it shut.
Final Thoughts
Water leaks into car cabins can occur in various ways. These can range from serious issues, such as a heater core problem, to a minor fix like a loose cabin air filter.
You’ll never know unless you investigate. Don’t wait and see if the breach will miraculously disappear if you pretend it isn’t there.
By now, you already know that it won’t go away on its own. Intervention is needed. For the sake of your upholstery, resale value, and your nose, you should act fast. Delaying the fix could lead to bigger, costlier automotive troubles in the long term.
Do you have any questions for us or stories to share about your experience with water leaks? Don’t hesitate to leave us a comment below. We’ll get back to each and every one of you!