If you’re not familiar with using head gasket sealer, or how to fix a rusty tailpipe, don’t worry. It’s better and safer for your mechanic to handle these sorts of problems for you anyways, or else you’ll run the risk of causing a more serious problem than the one you wanted to sort out in the first place.
Still, there are certain procedures and maintenance tasks that any vehicle owner can benefit from learning. For instance, checking tire pressure, replacing a flat tire, checking your oil levels, checking coolant level, or recognizing when and how to replace your antifreeze.
In this article, we’re going to tell you all you need to know about how to change coolant. If you’re tired of paying someone to do the job for you or you’d like to become an expert at doing this yourself for any other reason, we’re here to help.
We’ve laid out the whole operation for you with step-by-step guidelines. You’ll discover what supplies you’ll need, what tips to keep in mind to stay safe, and when you should go to a professional to get this sorted out (and what to expect if you do so).
Article Topic Key Takeaways
- Frequency – You should aim to change your coolant every 30,000–60,000 miles.
- When to Skip the DIY Approach – If your radiator needs a full flush or is leaking or corroded, it’s best to take your vehicle to a professional.
- Before you get started, it’s best to find out what type of antifreeze your vehicle manufacturer recommends and know the capacity of your cooling system, the mixing ratio of the product you’re using, and the recommended procedure for using it.
First Things First, Test the Coolant
A visual inspection won’t always be informative enough. Sometimes, only a coolant test strip will tell you for sure if your coolant fluid is done for and needs a change.
These strips can identify the presence of acids and other corrosive compounds. You can also learn the freezing point to see if it’s decreased.
These kits are easy to use and will give you results quite quickly. All you need to do is dip them into your car’s radiator or coolant reservoir and wait.
Information to Have Handy Before You Get Started
There are a few things you should know before you get started with changing your car’s coolant.
If you’re not very car-savvy, don’t panic – it isn’t all that difficult.
All of this information can be found in your vehicle’s owner’s manual. Those of you who don’t have it or can’t find it can check online, and you’ll most likely find this information easily there as well.
Recommended Brand of Antifreeze
Check what brand and type of antifreeze your car’s manufacturer recommends for you to use.
Those of you with antique cars or cars with particular needs might want to call your mechanic in the first instance, just to be extra sure.
There’s a chance they took the decision to use a different brand that’s more fitting, for a number of different reasons. If that’s the case, it might be best to skip the manufacturer’s suggestion. (That’s one of the few times you’ll ever want to do something like that).
Mixing Instructions
Certain brands are pre-mixed with water, while others will require that you add distilled water and mix the two together.
If your brand falls into the latter category, you’ll need to buy distilled water.
System Capacity
This is relevant for two reasons. First, you need to know how much antifreeze to buy. Second, the used coolant isn’t going to vanish into thin air; you’ll be transferring the remaining coolant to suitable containers to dispose of later.
The larger the vehicle’s coolant system capacity, the more you’ll need.
Suggested Procedure
The manual should tell you any and all instructions that are specific to your make and model of car.
You’ll need to carefully review this so you can locate the drain plug and lower radiator hose clamp, and ensure the necessary tools are to hand.
Required Equipment and Supplies to Change Your Car’s Coolant
Preparation should be a priority when you’re working on your car. You don’t want to be halfway through only to find you’re missing something!
To change your car’s coolant, you’ll need the following – so make sure you have them ready before you start:
- Antifreeze: You need new, fresh coolant for this! Stock up on the right brand and buy enough of it for your system. You’ll be surprised how many people actually forget to buy the main ingredient!
- Drain Pan: Buy a drain pan that matches your system capacity. This is where all the old coolant will be collected. If you don’t already have one of these, you can head to your local automotive supply store to get one or order one online. If you pick the latter option, take into account delivery times and costs. You don’t want to postpone the change for too long!
- Jack and Stands: Your car will need to be raised up for this job. You may not have enough room to work safely otherwise. Invest in stands if you only possess a jack. It’s better to be safe than sorry.
- Wrench or Screwdriver: You might need one of these tools to open your drain valve. This should be detailed in your owner’s manual.
- Safety Gear: Gloves and goggles are not negotiable.
- Collection Containers: Buy containers approved by your local toxic waste disposal center. Metal or plastic jugs or barrels should be acceptable. You’ll need containers for at least twice your system’s capacity. That means if your system is rated for 12 quarts, you’ll need 24 quarts worth. Avoid using makeshift containers or ones that aren’t secure, such as buckets.
- Access to Water: You’ll need access to a reliable water source, such as a garden hose.
Distilled Water (Optional)
Those of you buying antifreeze that needs to be mixed will have to buy distilled water, too. Tap water can contain impurities that could be harmful to your car, so you shouldn’t use that.
Tap water can include traces of metals that can encourage corrosion. Another example is sediment residue that could clog your car’s circulatory system.
Be sure you have a clean bucket on hand that’s available for mixing the water.
Safety First – Precautions to Take
As we’ve already mentioned, cooling fluid is a hazardous substance. To give you an example of how toxic it can be: less than three ounces of this liquid can be fatal to a dog if ingested.
The sweet smell can be appealing to pets and wildlife, and they don’t know any better, so don’t rely on them to stay away from it on their own.
Vivid, neon colors could attract curious children, too. For this reason, you should restrict children and pets from your work area while doing anything that involves the use of coolant. Responsible disposal practices are obligatory.
Last but not least, if you spill any antifreeze, new or old, clean it up immediately. Don’t put off cleaning the spot, get to it right away.
How to Change Coolant – a Step by Step Guide to Doing It Yourself
Now that you have your supplies ready and are aware of the safety precautions you need to take before you begin, you’re ready to attempt your first coolant change.
Let’s begin! Here are the steps you need to take from start to finish:
- Park Car on Level Ground: Set up your work area on level ground. Avoid sloping driveways where your drain pan or jugs of old fluid could spill. Similarly, a grassy surface isn’t a wise choice, as the jack could sink into the ground. You don’t want your car dropping on you all of a sudden!
- Allow the Engine to Cool: Give your car’s engine at least 30 to 45 minutes to cool off completely. If it’s hot outside or you’ve been on the road for quite a while, it may take even longer than that to properly cool off.
- Jack the Car Up: Lift your car so that you have enough space to maneuver underneath it. Then, place your jack stand to secure it in the correct positions.
- Prop the Hood Up and Disconnect the Battery: Open the hood and prop it up so it can’t slam down abruptly. Disconnect your battery by loosening the negative terminal bolt. This is just a safety precaution so that the engine can’t be turned on. This is unlikely to happen, but it’s definitely safer to do anyway.
- Put Your Safety Gear On: It’s time to don your safety apparel. Put your glasses and gloves on and make sure both are secure.
- Place the Drain Pan: Place your radiator drain pan under the radiator drain valve. If you’re not sure where it is, consult your owner’s manual again to locate it. It shouldn’t be difficult to find.
- Open the Drain Valve: Use your hand, wrench, or a screwdriver to open your drain valve. Some models have a drain cock that must be removed first. Set it aside so you don’t lose it.
- Let the Coolant Drain Completely: Now, it’s time to drain the coolant. All the old coolant will come flowing out into the drain pan. This might take more time if you have a larger system.
- Transfer the Old Coolant: Once the flow of liquid has stopped, move the pan out of the way. Then, transfer the used coolant to your disposal containers.
- Flushing (Optional): If you’ve decided to persevere with flushing your radiator on your own, we commend you for doing so! Check out the following article for how to flush a radiator and change engine coolant.
- Close the Drain Valve: Reattach your drain valve using your screwdriver or wrench if needed. Be sure that you tighten it securely, or else your radiator will leak.
- Quick Flush: If your radiator isn’t due for a full coolant flush just yet, you’ll still have to perform a quick one. This is just to clear out any old coolant. You can use plain water for this.
Come out from underneath your car and go to your radiator. You have two options here based on your vehicle’s make and model: You’ll have to remove the radiator cap or the coolant reservoir cap.
Consult your owner’s manual to discover which one is right for your car.
Then, follow these easy steps:
- Start by removing the radiator cap or reservoir cap and put it to the side.
- Pour as much water as your cooling system is rated for in the correct receptacle.
- Bring your car down to ground level and reconnect the battery.
- Idle your engine for 15–20 minutes.
- Repeat all previous steps to drain out the water, as you did with the old antifreeze.
- Transfer flushed water to your containers for further disposal.
- Disconnect the battery and lift your car up again.
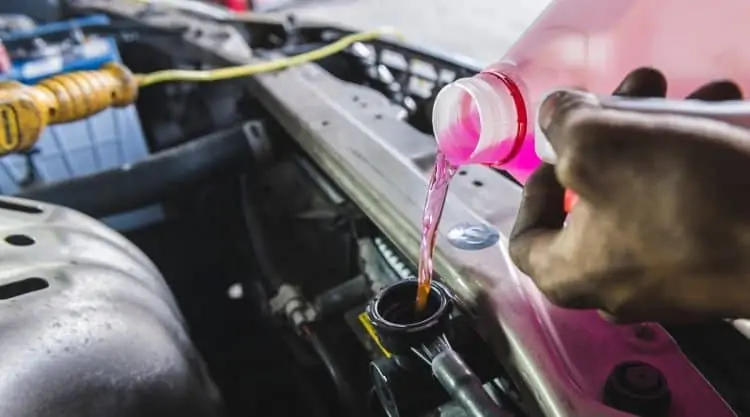
- Add New Coolant
You’re almost finished! Pour the correct quantity of antifreeze into the radiator or coolant reservoir.
If your new coolant isn’t premixed, bring your mixing bucket out, mix it as needed with diluted water, and pour it in.
- Perform Air Bleeding: Newer cars need to have an air-bleeding done. This is to prevent air pockets forming where they shouldn’t and causing further problems.
Check out the following guidelines for how to bleed air from a cooling system.
How Often Should You Change the Coolant?
There are a couple of variables that influence the answer to this question.
As a rule, you should stick to the recommendations specified in your vehicle’s owner’s manual. The manufacturers who designed your vehicle know best, obviously.
Depending on the make and model of your car, the frequency can vary. This can range from anywhere between a coolant change required at 30,000 miles, to one required every 60,000 miles you drive.
It’s important to stay on top of this at all times. Antifreeze regulates the temperature in your engine to keep it running smoothly and lubricating the water pump, radiator, and heater core. It also works to inhibit corrosion and prevent harmful substances from building up.
Much like other crucial fluids (such as oil), it degrades over time. As this happens, the liquid becomes less effective. If you neglect to change it for long enough, you could end up with serious problems.
Other factors that play a role in how often you change your car’s coolant can include:
Age and Condition of Your Car
Older vehicles may need to undergo more frequent changes than newer ones.
The same goes for cars with problems that cause engine overheating, as excessive heat will degrade the compounds in the antifreeze faster.
Antifreeze Type
Some types of antifreeze are made to last for longer than others.
These are often referred to as “long-life” coolants and contain ingredients that are resistant to breaking down, such as carboxylic acid.
A note on the difference between antifreeze and coolant: You may see these words used interchangeably. They are pretty much the same thing, but generally speaking, engine coolant is a mix of antifreeze and water, usually distilled. But most people use both words to mean the same thing, rightly or wrongly.
How You Drive
Subjecting your car to harsh driving conditions means that you’ll be in for more frequent changes.
Towing heavy loads increases engine temperature. This also applies to daily trips through stop-and-go traffic.
When to Leave It to the Professionals
The DIY route of changing your car’s coolant yourself isn’t always the best option to go with.
If any of the below scenarios apply to you, you’ll be better off if you leave it to your mechanic:
Corroded Radiator
Fluid that has noticeable signs of degradation is almost always a bad sign. Floating pieces of rust or sediment could indicate a corroded radiator.
In this case, it’s advisable to let your mechanic take a look at it. You might end up with more serious problems than just replacing your car’s old coolant.
Leaky Radiator
You should be familiar with the signs of a leaky radiator. Typical symptoms are:
- Overheating engine.
- Sweet-smelling exhaust.
- Oily coolant.
- Puddles of antifreeze underneath your car.
If you suspect your radiator or radiator hose is leaking, you should go to your mechanic as soon as possible.
Full Flushing Needed
If your radiator is due for a flush (a regular maintenance task if you have an internal combustion engine!), you may want to avoid being the one to do it.
The full flush procedure can be time-consuming and can be a very messy process if you aren’t familiar with it.
How Much Does It Cost to Change Engine Coolant Professionally?
You can expect to pay anywhere from 50 to 150 dollars to have a professional change coolant in your car for you. This is just a general estimate, though, and the actual price can vary based on several considerations.
For example, a full flush will cost you more than a standard draining and refilling coolant process.
Certain businesses may also charge you more than others. For example, if you go to your car manufacturer’s dealership, you’ll likely pay more.
Conclusion
Hopefully, by now, you know everything there is to know about how to change coolant before you start the engine again.
Changing engine coolant isn’t all that complicated of a process, and you can spend the money you’ve saved from not going to your mechanic on something else instead.
It’s also one of those tasks you’ll be repeating again in the future, so it’s great to learn how to do it all on your own. If the first time was a little rocky, remember that you’ll get better with practice, and it’ll become a piece of cake in no time!
Last word of caution before we wrap this up: Bear in mind that changing your antifreeze shouldn’t always be attempted from home. If you think your vehicle has a corroding radiator or another grave problem, call your mechanic.