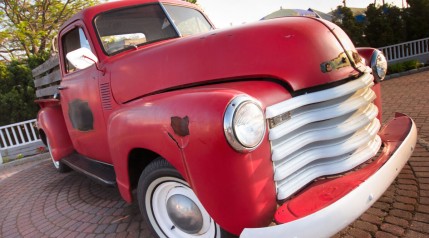
All bare metal is prone to rust, and the same holds true when it comes to the metal of your car.
The best thing you can do with your vehicle is to act fast and remove rusting spots as soon as they form, because surface rust accumulates and can grow at a scary rate of progress. If neglected, what starts out as a small problem can evolve into a serious one over time.
In this guide on how to remove rust from a car, you’ll learn everything you need to know to keep your ride rust-free. We’ll cover a few simple removal techniques, clue you in on what supplies you’ll need, and reveal a few common household products you can use to save splurging on a commercial remover.
Key Takeaways
- Alternative Removers – Cola and white vinegar both have acidic properties that will break down rust almost as well as a commercial remover.
- Assess the Damage – Before getting started, take time to assess the damage. The supplies and degree of effort required to treat surface damage differ significantly from those needed for penetrating rust.
- Serious Savings – Doing this repair job yourself could save you around $100 for minor damage and over $1000 for more serious damage.
Contents (Jump to Topic)
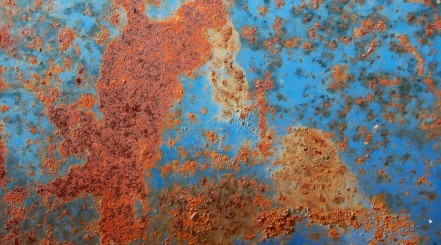
What Is Rust?
Rust is the result of a chemical process called corrosion. The three elements needed for it to form are iron, water, and oxygen. When these three elements react together, they create hydrated iron oxide, commonly known as rust.
There are also outside factors that can facilitate the formation of rust as well. The most common of these factors are:
- Humidity.
- The weather.
- Acid rain.
Since water is needed to create rust, the more humid the climate is, the greater the chance that rust will form on any metal surface, which includes your car.
Being in an area that experiences heavy or frequent rainfall, and living close to water sources such as the ocean, a lake, or a river are all factors that will increase the chance of rust formation on your vehicle.
Heat also helps create rust more quickly as it speeds up chemical reactions. Usually, more rust forms in summer than in winter.
That said, snow is a form of water, and therefore leads to corrosion. In locations where snow is common, moreover, road salt is used to grit most main roads and highways. This salt reduces the danger of icy roads but accelerates rust formation on cars.
Finally: acid rain. Rain promotes rust formation in general, but if it’s acid rain, the situation can worsen quickly.
The reference to acid here refers to the pH of the rain droplets, which is acidic. It is caused by sulfuric and nitric acids combining with the water molecules.
Specific Commercial Products for Rust Removal
The process of rust removal isn’t difficult in and of itself, but it takes quite a lot of time and effort, so be prepared.
You can either do this inside your garage or, if you’re outside, choose an overcast day without wind to work on this.
We’ll start with a list of commercial products that are extremely useful in removing rust from cars:
- Masking tape or painter’s tape.
- Newspapers or real masking paper.
- Rust remover.
- Rust converter.
- Clean rags.
- Grease and wax remover soap.
- Fine-grit sandpaper.
- Self-etching primer.
- Color base coat paint.
- Paint color that is the same color as your car.
- Clear paint.
- Protective eyewear.
- Gloves.
The following three items won’t be needed if you’re dealing with light to medium rust damage – they’ll only be needed for heavier damage:
- Dust mask.
- Grinder with a sanding wheel/grinding wheel.
- Fiberglass-reinforced body filler.
How to Remove Rust From a Car (Minor Damage)
Now that you know what you need and have gathered all the necessary items and equipment, let’s look at the steps needed to remove minor rust damage from your car.
1. Protect Yourself
Safety first! Be sure you have the necessary safety gear on before you start with any of this, and wear gloves and eye protection at all times.
Some of the products you’ll be using, such as auto-paints, are quite toxic, so make sure you don’t come into direct contact with them. Also be sure to wear a mask because there will be a lot of rust and paint particles floating around once you get to work.
2. Prepare the Car Area
Use the tape for masking the car area that’s developing rust. Tape off a slightly larger area to work on than you need.
You want to make sure not to get any of the products, especially automotive paint or paint primer, on the wrong spot. You can use newspapers to cover up the surroundings of the masked-off area to avoid mistakes.
3. Spray the Remover
Make sure to read the directions carefully, since each product might have different steps to follow than other products.
Spray the remover or rust converter on the affected area, and let it act for a few minutes.
4. Wipe Off or Scale Rust & Apply Grease and Wax Remover Soap
Use a clean tack rag to wipe the rust off your car’s surface. If you have any blisters, use your hand scraper to get down to the rust underneath. If it’s not all gone, use sandpaper to get rid of the residue.
It’s important that you don’t proceed until all of the rust is removed; the smallest residue can spread and cause further trouble.
When you’re done, clean the affected part thoroughly with grease and wax remover soap, then let it dry.
5. Use Self-Etching Primer
If you haven’t done this before, practice on a piece of cardboard first. If in doubt, follow the instructions on the tin. When you feel confident enough with the process, use it on your car.
When you want to apply primer, we recommend a light to medium coat of primer. Spray three coats on and let the primer dry for an hour.
6. Spray on the Color Base Paint
We suggest a lighter coat of paint than the primer. Usually, five or six coats are needed.
Make sure to wait for each coat to completely dry before you spray on another coat. This will prevent paint drops from forming. 15 to 20 minutes should be enough between layers.
7. Spray on the Clear Coat
Spray the final clear coat. For the best results possible, apply three to four coats, ensuring that you leave each coat to dry before moving on the next.
Now that you have a dry coat, make sure to wait at least three days before washing your car, and wait at least two to six months before waxing.
How to Remove Rust From Cars (Major Damage)
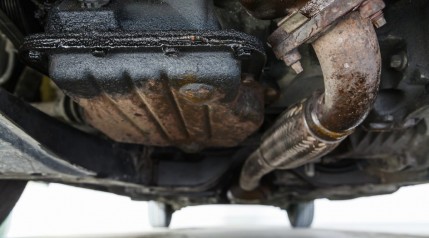
If the damage is extensive or you have penetrating rust (when it eats into the metal underneath the paint), the steps below will help with the repairs.
Keep in mind that if more than 20% of any car part is heavily damaged by rust, you’ll need to replace it.
1. Protect Yourself
In addition to wearing gloves and eye protection, you’ll also need to wear a dust mask.
Protecting yourself should be your number one priority whenever you handle chemicals like rust converters or removers or will be exposed to loosened rust, paint particles, and other contaminants in the air.
2. Prepare the Car
You’ll still need to tape off the surface area you’re working on.
If you need to sand through the car’s paint and primer, cover the rest of the car too. Preserve both the car and yourself from the dust.
3. Remove the Rust
If the rusted area is large, you’ll need to use a grinder with an abrasive wheel.
Take off all excess rust, but be careful not to apply too much pressure. You don’t want to create more damage.
4. Apply the Grease Remover
Clean the entire area thoroughly using grease and wax remover soap.
Without doing this, you could further damage the paintwork, and your repair job won’t be as efficient.
5. Fill in All Holes
This is the purpose of the fiberglass-reinforced body filler. If the damage is extensive, you’ll be left with larger holes and depressions.
Fill everything in properly, and be prepared for this to be one long and slow process. For the most part, curing time will be affected by humidity and heat.
Warning: do not use body filler if the outside temperature is cooler than 65 degrees Fahrenheit! Always read the instructions on the filler container, too.
6. Sand the Affected Area
After the fiberglass has hardened, you’ll need to sand the affected area. As you’re sanding off the paint, keep changing to finer grit sandpaper until the surface is perfectly smooth.
Check this guide for details on exactly how to wet sand a car.
7. Use Self-Etching Primer
It’s a good idea to practice on some cardboard before applying the primer directly to your car. Follow the instructions on the container, and then use it on your car when you feel confident to do so.
A light to medium coating is preferred, with an application of three coats. Be sure to let the primer dry as instructed on the tin before moving on to the next step.
This product is used as a base for paint, and stops rust from forming again.
8. Apply Paint & Clear Coat
This is the paint of the same color as your car.
Again, we suggest at least six coats, lighter than the primer.
Allow at least 15 to 20 minutes for the paint to be completely dry before proceeding with the next coat.
Finally, apply the clear coat. This protects your paint job and makes it last longer. Three to four layers are recommended here, following the instructions on the container to a T.
Two Effective Household Products
It’s not possible to completely substitute all the products needed to remove rust from a car with just household versions, no matter how good you are.
You’ll still need to use primer and paint, for example. You can substitute the toxic rust remover if you’d like to, though.
There’s one weird trick that is proven to work on minor damage: Coca-Cola! Believe it or not, this is a tried-and-tested method to keep your car clean from any old, rusty regulators. Soak them overnight, and the metal will look like new the next morning.
Magic, right? Well, not really. This is because coke contains citric acid (which removes stains) and phosphoric acid (which dissolves rust). Another plus is that it is carbonated, so it breaks rust faster.
With that being said, and before you go crazy with this method, note that you cannot soak your rusting car part in a tub of coke. Instead, here’s how to use it:
- Pour directly on the affected area.
- Let it sit.
- Scrub the surface with a sponge.
- Repeat.
- Each time you scrub, more rust will be gone. Don’t overdo it if there’s no longer need for it, though, otherwise you’ll be scrubbing into the metal surface.
Another household product you can use as remover is white vinegar. Use it in the same way as Coca-Cola. Clearly, these two products can be used only on minor rust accumulations, such as spots, and not on more serious cases.
Professional Help
What if you don’t want to try and remove the rust from your car yourself?
If you prefer to go to a professional, costs will vary greatly, from around $100 for a minor spot to over $2000 if the damage to your car’s body is extensive.
Consider the trade-off between your time and expense in collecting the commercial and household products we’ve mentioned, compared to the ease but higher cost of using a professional.
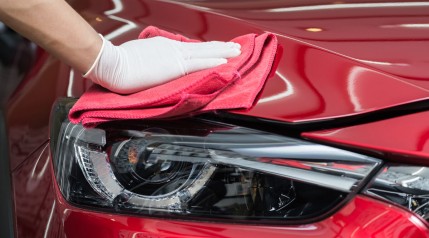
Tips to Prevent the Formation of Rust on Your Car
The best way to enjoy a rust-free ride, besides having to resort to using a rust preventive, is to prevent it from forming on your car in the first place.
Here are a few helpful tips you should keep in mind:
- Park in a garage.
- If the car is stored outside, use a cover for protection.
- Remove salt from your car in winter.
- Add a coat of wax to your car surface before winter for protection.
- Check the body of your car regularly.
- Take care of any rusted spots immediately.
Final Thoughts
We’ve seen what rust is and what to do if it attacks your car.
We’ve given you the steps to solve this problem, whether you’re dealing with major damage or just a few rust spots.
We’ve also shared a few effective tricks to help you avoid this from happening again in the future. One less car maintenance task to worry about is always a win in our book!
Before we sign off, keep in mind that the best way to avoid major rust damage on your car is to take care of any spots right away and as soon as they begin to form.
It’s not difficult to do this by yourself, but it does require time and patience. If you’re short on either of these, you can always hire a professional to do it for you!