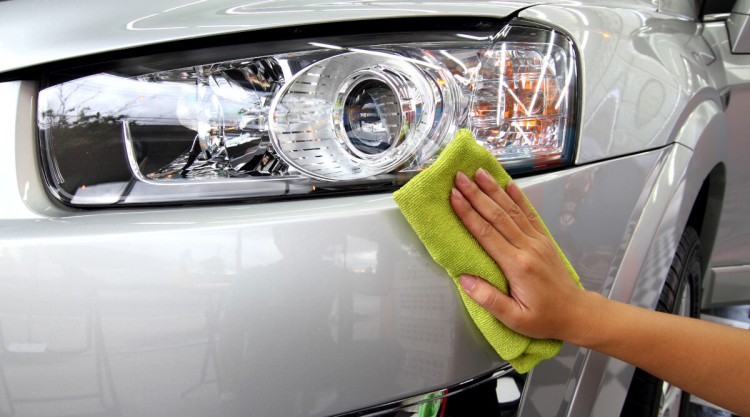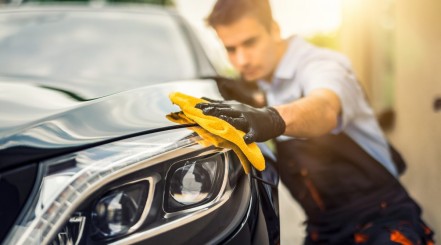
Notice your car headlights don’t produce as much light as they used to?
In this guide, we’ll teach you how to clean your headlights using four simple methods. We’ll start by helping you determine whether your lights are in need of replacing or just a good clean. After that, we’ll move on to step-by-step cleaning instructions using both commercial products and those you might already have at home.
Ready to get those headlights shining like new? Let’s jump right in!
Contents (Jump to Topic)
Key Takeaways
Multiple Methods – You can use a store-bought cleaning kit or a range of household supplies
Mind the paintwork! – always tape off the surrounding are to avoid paintwork damage when cleaning foggy headlights
UV Sealants for the Win! – Finish off any cleaning process by adding a sealant to ward off oxidization.
Method 1: Headlight Cleaning Kit
A headlight cleaning kit, also known as a headlight restoration kit, is something you can use to quickly return them to their original clarity, shine, and brightness.
Since clean headlights these days have polycarbonate plastic covers, they tend to decay over time due to road grit and exposure to UV rays. These restoration kits can reverse the symptoms of this damage and get them back in great working order.
Tools Needed
- Headlight restoration kit.
- Masking tape.
- Towels.
Step-by-Step Guide
Step 1: Pick the Timing and Location
You should do this process on a day when the weather isn’t freezing or wet. The car also needs to be in the shade.
Step 2: Set Down the Masking Tape
Cover the area that surrounds each of the front lights with masking tape. This protects the top coat of your car from the chemicals and processes that you’ll be using when washing your lights.
Step 3: Prepare the Headlights
Get out the pads and washing supplies from the kit.
Put a small drop of the washing compound on a cleaning pad and then scrub the plastic lenses of each of the front lights, alternating between side-to-side and circular motions.
Step 4: Check if You’re Done
Wipe down the lenses with an unused towel. If you see that the lenses now appear to be frosty, then you’re done. If not, repeat step 3 above.
Step 5: Wipe and Dry
Give the lights a final wipe over with a damp towel and then let them dry.
Step 6: Headlight Coating
After the headlights are completely dried, you’re going to use the headlight coating solution from the headlight cleaning kit.
Apply a coat and wait 5 minutes before applying a second coat. Always check the instructions on the product you’re using just in case the manufacturer advises differently.
Step 7: Let It Sit
The headlight coating solution is going to feel dry a few minutes after you’ve applied it. However, you should let it cure for about a day.
Place your car somewhere dry and check on it the next day to see that your lights are back to their former glory.
Method 2: Vinegar and Baking Soda
Many household items can be used to clean headlights if you’d rather not use a cleaning kit, vinegar and baking soda can have a good cleaning – but no restorative – effect. In fact, a solution made out of baking soda and vinegar is great for washing out practically everything.
Tools Needed:
- Vinegar
- Baking soda.
- Bowl.
- Spray bottle.
- Water.
- Towel.
Step-by-Step Guide
Step 1: Grab Some Vinegar and Baking Soda
Mix two tablespoons of the baking soda with four tablespoons of the vinegar inside a bowl.
Step 2: Clean Your Headlights
Using a fresh towel, apply the mixture to the lights. Make sure you rub and cover the entire surface of the lights using circular motions.
Step 3: Rinse the Headlights
After covering the surface of the headlights with the baking soda and vinegar mixture, you can then rinse them off with clean water and a sponge, or a spray bottle.
Clean away any residue of the mixture. If you see any white haze on the lights, it means they haven’t been rinsed off well enough.
If the lights don’t appear fully clear while doing this, repeat the entire method until everything looks spotless.
Method 3: Use Polish
Another option for cleaning headlights is using a polishing compound. The polish is specifically made to be able to remove any of the surface scratches from your car, which means it should do the same to your front lights.
Tools Needed:
- Polish compound.
- 2 x clean microfiber towel.
Step-by-Step Guide
Step 1: Get the Polish
You can get any kind of polish for this. If you already have something that you use to polish your car’s paint, that will be fine. You don’t need anything expensive or fancy here.
Step 2: Work Slowly
Apply a small drop of polish to a fresh microfiber towel made for vehicle cleaning.
Buff it onto the front lights in small areas with a circular motion. After a few minutes, the area will start getting clearer, and then you can move on to another area.
Continue until the entire surface of each headlight has been cleared.
Step 3: Wipe, Rinse, and Dry
Wipe off any residual polish and give the lights a good rinse with regular tap water. Grab an unused microfiber towel and dry your lights for the completed look.
Method 4: Wet-Sanding
Wet-sanding your car lights is a long process, but one that removes the oxidation on the headlight lenses that makes them look faded and produce less light.
Tools Needed:
- Wet sandpaper (400, 1,000, and 2,000 grit)
- Masking tape.
- Towels.
- Spray bottle.
- Water.
Step-by-Step Guide
Step 1: Get Sandpaper
Make sure you have varying grades of sandpaper for this method: A coarse 400 grit, a fine 1,000 grit, and the finest you can find for the finish (2,000 grit or higher.)
Step 2: Use the Masking Tape
Prep the area you’re working on. Tape the entirety of the area that surrounds each headlight. This is to protect the surrounding painted areas of your car.
Step 3: Wet the Sandpaper and Start Sanding
Get your spray bottle and fill it with water, then spray the sandpaper.
Start with the sandpaper that’s the coarsest and apply even pressure with your hand on the headlight. Make sure that you’re sanding in one direction only.
You’ll know that you’re done with that grade of sandpaper when you see a dull finish on the front lights.
Then you can get a square of a finer grade of sandpaper and repeat.
Step 4: Rinse and Dry
Rinse off any grime and sanding debris with regular water, buff the lights with a clean microfiber towel, and revel in your accomplishment.
Finish Off With a UV Sealant
After you’ve washed your lights, with any of the methods, it’s good to apply UV sealant over the top.
This type of sealant will protect your lights from the harmful sun rays that can cause the discoloration you just cleared up and removed.
Why Would You Want to Clean Your Headlights?
The most important reason for keeping your headlights clean is safety.
There’s no stopping the front of your car getting dirty, but there’s a big difference between dirty paint and dirty headlights. The build-up can reduce the light intensity, making it harder for you to see in the dark and for other road users to see you.
That isn’t to say you need to get replacements straight away, though. It just takes a little elbow grease to get them cleaned up and even restore headlights permanently to their factory clarity and cleanliness.
Do They Need Cleaning?
To know whether your front lights need to be washed or not, you’ll need to do an inspection. Don’t worry, it’s easy, and is the same process for HID or LED headlights.
Visual indicators such as cloudy, dull, and yellow headlights are a good sign that they need cleaning. Bear in mind that yellowing can occur on both the inside and outside. If it’s just on the inside, the methods we discuss here won’t work, and further internal inspection and cleaning is needed.
All clean headlights have a hard layer over them that protects the lights themselves. If you see that this layer is wearing off, it’s a sign that your lights have hazing and will soon have a crusty yellow surface.
To confirm your visual suspicions of hazy headlights, run your hand over the outside of the light. Is it bumpy and rough? If so, this is a clear indication that the problem is on the outside. If you leave the lights like that for a long time, they’ll begin to crack.
If you’re still unsure, take a look at your headlight lenses during the daylight while they’re turned on. Then, check them in the daylight when they’re turned off. If you see any big scratches or damage, get a professional to check them out because that’s a serious issue.
A Pre-Emptive Clean
If you see your front lights are dirty and can’t be sure whether they’ve been damaged, you should start by giving them a regular wash with some soap, water, and a soft cloth.
After the wash, wipe them down and leave them to dry. Once they’re dry, you can see whether they are due for a fix-up or replacement.
Shine Bright Like a Diamond
As you now know, there are a few options to clean foggy headlights and restore them to their former glory. However, always make sure that you inspect them to check whether they need to be cleaned or need replacing.
If you’re unsure about anything, you can always ask a professional to take a look and tell you what needs to be done.
No matter your cleaning method of choice, don’t forget to always get a UV sealant to finish. Otherwise, you’ll be back to where you started, with oxidized headlights that you need to wash again.
If you have any tips or questions, make sure that you leave them in the comments section below.


