To keep our cars running as they should, there are many regular checks we can carry out by ourselves, instead of paying a professional to do them for us.
One of these is checking that the car’s engine oil is at the right level. We can also then make the necessary adjustments when it’s not.
This is something that is done by your mechanic every time you bring your car for regular service, but it’s a good idea to do regular checks in between. It takes a matter of minutes and is time well spent for a smooth-running engine.
In this article, we guide you through the straightforward process of how to check the oil level in your car with step-by-step instructions.
Skill level: Beginner
Time to Complete: 5 minutes
Tools needed:
- A cloth, paper towels, or an old rag
- Engine oil (if a top-up is required)
- Funnel (if a top-up is required)
Key Takeaways
Check Regularly – Levels should be checked every 2-4 weeks, depending on how often and far you drive your car.
Which Oil? – Check your owner’s manual to make sure you’re topping up with the right oil.
Don’t Ignore Signs of Bad Oil – Various indicators will let you know if your oil is contaminated or needs changed – don’t ignore them!
How to Check Car Oil Level: Step-by-Step Instructions
As we’ve mentioned, this is a fast and straightforward process. The following sections spell it out step by step, so you’ll know exactly what to do.
Step 1: Park Your Car on Flat Ground
To get an accurate reading, your car must be on level ground. This ensures that the fluid is not gravitating to one side of its container.
Step 2: Turn Off the Engine
Never perform this check while the motor is running. Turn it off, and then wait around 10 minutes before opening the hood to let the motor cool down.
Step 3: Open Your Car’s Hood
In most cars, the control for opening the hood is near the driver-side door.
Pulling on the latch will pop the hood open—after that, it can be raised manually.
Once you’ve lifted it, how does it stay up?
For some, the hood will remain open on its own once raised. For others, a rod is needed to support the hood and hold it in an upright position. This will be built with one end attached to the front of the hood. The other end can be swung down to connect to the car body.
Step 4: Locate and Remove the Dipstick
Oil dipsticks tell you how much liquid is in the oil reservoir. Most often they will have a yellow, orange or yellow cap. They also have a circular or rectangular ring that can be handled with one or two fingers.
The oil dipstick might be found on either side of the engine block. For vehicles with rear-wheel drive, the dipstick is housed further back in the engine. In front-wheel-drive cars, it is usually found nearer the front.
Automatic transmission cars have an additional dipstick under the hood for the transmission fluid, which is usually pink or red. It’s crucial not to confuse the two. Adding oil to the transmission could lead to serious damage.
Once you have located the dipstick, remove it.
If you have a newer vehicle and can’t locate the dipstick, check your dash for an electronic oil monitor.
Step 5: Check the Level
After you have removed the oil dipstick, wipe it clean with a clean rag or paper towel, then reinsert the dipstick. Now pull the dipstick out again, and look carefully at the residual product at the end of the stick.
Notice how high it reaches on the stick. Dipsticks have two markers for measuring the level. At the bottom of the stick, there is a marker for the minimum level and another for the maximum.
When the level is correct, the liquid on the dipstick will be somewhere between the minimum mark and maximum mark. Otherwise, further action will need to be taken.
What To Do if the Level Is Too Low?
If the oil level is below the minimum marker, this means you need to add engine oil. Before adding more oil, it’s very important that you choose the right one. There are different types available for specific engines, synthetic oil, and high-mileage oils. They can all vary in weight and viscosity.
Each one has a different grade, such as 5W-30. The oil recommended for your car should be found in your owner’s manual.
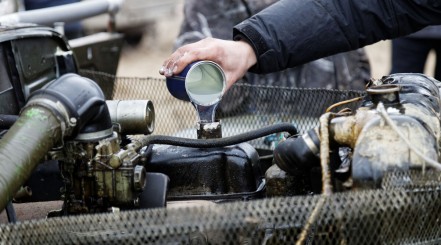
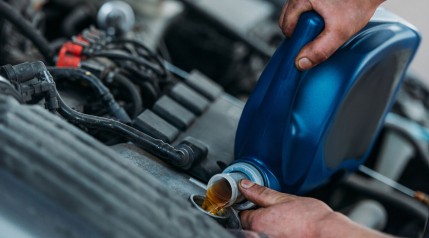
If you do need to top up, you’ll now have to find the oil filler cap. This is usually on the top of the engine, and may be marked “oil fill.”
Remove the cap and wipe it clean. Using a funnel, add oil into the engine slowly and carefully to avoid any spillages.
Once you have added a sufficient amount of liquid, use the dipstick again to see if you’ve added the right amount.
If it is now somewhere between the minimum and maximum markers then you have added enough. If it’s still low, you should repeat the process until the desired level is achieved.
What to do if the Level is Too High?
This is one of those products where more is not necessarily better. In fact, having too much oil in your engine can lead to major malfunctions, which can be costly. It can become aerated and foamy, and this is not good for lubrication.
In some cases, too much will cause the oil to stop flowing, and the engine will become too dry. This is not only damaging but can cause the engine to seize up.
If your level is found to be too high, this might be due to over-filling. It could also be from something leaking into the engine oil, such as water or coolant. If it’s the latter, take it seriously.
This kind of leaking is a problem that will need to be addressed and you should take the car to a mechanic as soon as possible.
As we said, the excess may be due to you having overfilled it. If that’s the case, you now have to remove some. It can be drained in one of two ways.
The first and simplest method is to use a siphon or turkey baster to pull the extra liquid out. This can be done from either the filler or the dipstick tube.
Alternatively, you can locate the drain plug, and remove all of the oil. It’s a more complicated process, and should only be done if the extra amount is substantial. The drain plug is located at the bottom of the oil pan, which is underneath the engine.
Tools will be needed to remove the plug, such as a ratchet, and maybe an extension for it. A catch pan will also be required for the liquid to drain into.
Inspecting for Age and Contamination
When checking your oil, you should also check for old age and contamination, both of which can be responsible for the oil not working to its fullest potential, or worse, severely damaging your car.
Detecting Aged Oil
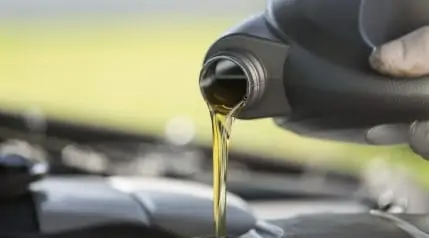
The oil’s color and condition tell us about its age. Over time the color will change from golden to black. This is caused by particulates from the motor and internal combustion process filtering through into the liquid.
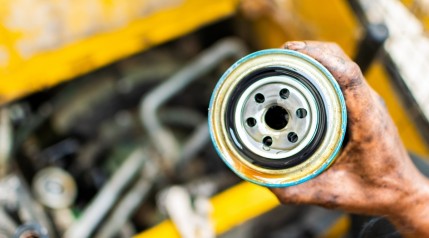
Dark brown or black means that it needs to be replaced. If it’s extremely dark, you should consider replacing the oil filter too.
Detecting Contaminated Oil
To check for contamination of coolant, unless it’s severe, the only thing you can do is to smell the dipstick. Motor oil is earthy, while coolant is sickly sweet.
For water contamination, there will be a somewhat translucent brown, thinner deposit on the dipstick above the oil line.
Also, if the oil has not been changed frequently enough, carbon deposits may build up in the engine. You can check for this by looking into the vehicle’s engine through the oil fill cap.
If you see slimy deposits, dirt, or dirty oil on the engine parts – commonly called “sludge” – then the lubricant has not been changed often enough. A more frequent routine will be needed in the future.
Conclusion
All in all, checking your engine oil and taking the right steps to keep it in order is a relatively simple routine. Most people will be able to do this without too much trouble.
Have you been one of those people who prefer to hand over all technical chores to the mechanic? Don’t miss out on this chance to learn something about the workings of your vehicle. Doing it yourself will save you time as well as money.
Try following these simple steps to check the oil level in your vehicle. If you’ve given it a try or have any questions, let us know in the comments below. We’ll reply to every comment.
Frequently Asked Questions
Why Check Your Oil Levels?
We’ve already mentioned that this check is done regularly during routine service. You might be wondering, then, why you need to do it yourself in between.
Every time you drive your car, heat and friction work against it to wear parts down. This can eventually destroy your engine. Oil provides much-needed lubrication, as well as resistance to wear and tear.
Every vehicle needs to have a fresh supply of clean oil because, without it, the engine will experience tougher work. It may fail or seize up, which can cause the car to stall while driving. This is why we need to check the levels and quality, and perform an oil change regularly.
By doing so, we can know for sure that there’s enough oil for purpose, and that it’s clean and free from contaminants.
When to Check Your Oil Levels?
It’s best to check your car’s oil level once every two weeks, and at the very least once a month.
It varies, so it’s best to double-check your car’s owner’s manual.
If you’re planning a long journey, you should do a thorough check on your vehicle before you travel. This includes checking all fluid levels.
There are a few telltale signs that you need to perform an oil check. Has your engine been making knocking sounds? If so, this is one of the first things you should be checking.
It should also be done if the exhaust is producing smoke. And of course, the most obvious time is if the warning light appears on your dashboard.
Should Oil Level Be Checked When the Engine is Hot or Cold?
The answer lies somewhere in between—it’s best done when the motor is warm. Take your vehicle for a quick drive, and then turn it off. You should then wait for approximately 10 minutes before doing the check.