There’s no doubt that certain automotive repairs and tasks are better left to the experts. Undertaking some jobs without the necessary know-how or equipment can be a recipe for disaster.
On the other end of the spectrum, though, are many simple operations that don’t require an advanced home garage or a degree. Learning how to put air in tires is one such task.
In this article, we’ll teach you how it’s done by guiding you through every step of the inflation process. You’ll also get familiar with the signs of under- and over-inflation, and learn the importance of keeping your tires inflated to the correct level.
Key Takeaways
- Pressure is Important – Maintaining the correct pressure can improve gas mileage, prevent uneven wear on your tires, and make for safer handling.
- Inflation Level Is Critical – Before you start, make sure you know your tires’ recommended kPa or PSI level.
- Warning Signs – Signs that your tire pressure is low include TPMS alert, worn-out treads, and difficulty controlling your car.
Skill Level: Beginner.
Time to Complete: 10 to 15 minutes (excluding time for cool-down).
Tools Needed:
- Gloves.
- Air pressure pump or compressor.
- Tire pressure gauge.
Before Starting: Find Proper Tire Inflation Level
It’s essential to know the recommended tire pressure for the particular tires on your car. Too much air is just as bad as a lack of it and over-inflation carries similar risks as under-inflation.
Your owner’s manual should include recommended PSI for factory tires. In some vehicles, it can be found on a sticker inside the door jamb on the driver’s side.
Other common locations are the glove box, inside the trunk, and the gas tank lid. However, take the suggested number with a grain of salt.
The information may not be relevant to the set you currently have on your car though if you’ve replaced the tires for different ones than those the manufacturer provided.
If this is the case, then read the recommended air pressure from the side of the tire wall.
kPa or PSI Number
On the exterior tire wall, you’ll see the kPA (kilopascal) or PSI (pounds per square inch) rating listed.
Take note that this number is the maximum safe inflation pressure. It’s not the recommended PSI (or the kPA) for normal operation.
How to Put Air in Tires
Let’s get your tires refilled! We’ll be beside you each step of the way with the following instructions.
1. Put Gloves on
Put your gloves on to keep your hands from getting filthy. They don’t have to be thick work gloves, latex will be fine.
2. Remove the Valve Stem Cap
You’ll find the valve stem caps on the outer side of the rims, near the bead. Most are plastic and are easy to screw off.
Keep it somewhere safe so you won’t lose it. Don’t just set it on the ground where it can roll off and disappear.
3. Turn on the Air
If you’re using an air compressor, switch it on so that it’s ready to go. Those of you who are at a garage should do the same. If you have to insert coins to get it started, do so now.
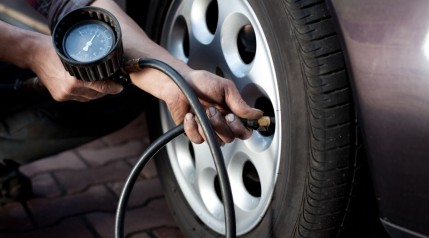
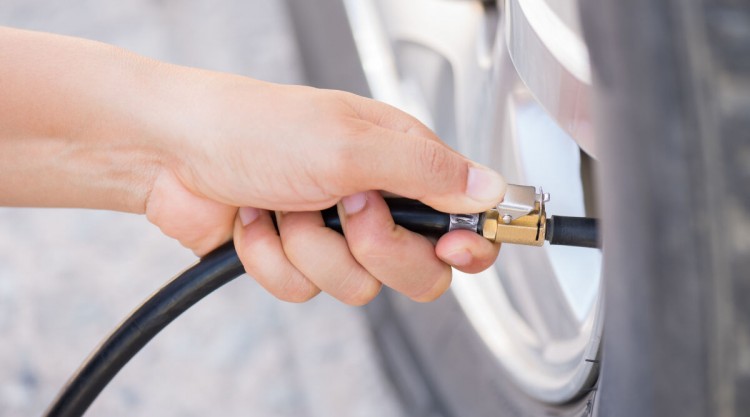
4. Attach Air Hose
Attach the end of the compressor hose to the valve on your tire. Press it squarely onto the valve stem to prevent air from escaping.
If you hear hissing, the hose isn’t in place. Adjust it until the hissing stops, this means it’s secure. Allow air to flow for roughly five seconds at a time and no longer.
For units that are visibly flattened, you can allow them to inflate for longer stretches. Start using five-second intervals when it begins to look firmer and closer to correctly inflated.
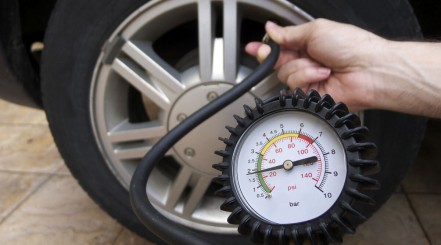
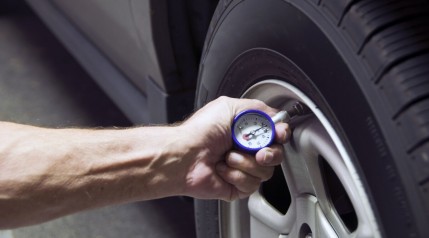
5. Examine the Readout
Insert your tire gauge or check the one on top of the compressor. Compare the figure to the recommended inflation level for your tires.
If it’s too low, you’ll have to keep adding air. Higher than it needs to be, and you’ll need to let some air out.
To add air, repeat the process of attaching the air hose and running it for five-second bursts. Check gauge display until the desired PSI reading appears.
To release air, let it escape from the valve stem in short bursts. Insert your gauge every five seconds or so until you attain the proper tire pressure. Or, keep an eye on the attached gauge.
6. Finishing up: Desired Air Pressure Attained
Quickly replace the valve stem cap, making sure it’s screwed on tight. The job is done.
Why Is Correct Tire Pressure So Important?
The optimal air pressure of a tire is based on several variables. The make and model of the car plays a role, as does the size and type of tire.
Poor inflation doesn’t mean that you have to be driving on a flat. It may be hard to tell at first glance that you need a refill.
You might be surprised to find out that the average tire loses about one pound per square inch (PSI) of pressure per month. This is natural and means all tires need periodically refilling.
There are lots of benefits to sustaining correct PSI. If you don’t believe us, consider the dangers of driving on unstable tires.
Decreased Tire Lifespan
A properly inflated tire is firm and stable. Contrastingly, underinflation makes the unit more flexible.
The weight of your car won’t be distributed equally. This can cause certain areas to wear out faster than others, typically on the outer tire treads.
Greater Risk of Getting a Flat
The stressed parts of an under-inflated tire are more susceptible to damage. Sharp objects or other hazards on the road can puncture these vulnerable sections.
Loss of Traction
The flexibility we just mentioned is bad for other reasons. It reduces the traction (or grip) the treads can get on the road.
This is what enables you to stop your vehicle without skidding. On wet or snowy roads, a lack of traction can have dire consequences. With optimal PSI, you get improved traction.
Lose Gas Money
Fuel economy can be affected by a low PSI. Your gas mileage can drop by as much as 0.3 percent per one pound of pressure loss.
With fuel prices soaring, you’ll want to save wherever you can. That small percentage can add up given enough time.
Increased Chance of Accidents
Even a single tire that is incorrectly inflated raises your risk of suffering an accident.
There are too many hazards on the road to worry about already. Why make something that’s easy to remedy one of them?
If you want to know more about safe practices in general, watch this informative video from the Tire Industry Association:
Signs Your Tire Pressure is Low
After everything you’ve just read, you should now have good cause to be concerned and want your tires properly inflated.
Note that a tire pressure gauge is the only way you can get an accurate PSI reading.
Still, there are specific symptoms you can look out for that may mean your tires have lost pressure. Pay attention to the following warnings:
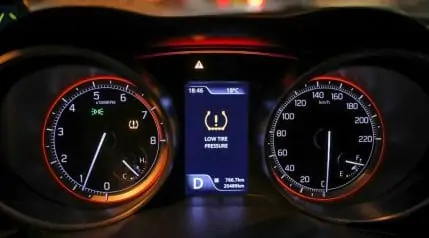
TPMS Alert
The bulk of modern vehicles on the market today are built with a tire pressure monitoring system (TPMS). They’ll indicate when air levels drop below the minimum acceptable PSI for safe driving.
This can be through your vehicle’s dashboard display screen or a warning light. You should familiarize yourself with where it is and how to read it.
Difficulty Controlling Your Car
A car that’s hard to handle could be a symptom of low inflation. Vibrations, skidding when you brake, or reduced stoppage are all possible indicators.
Worn-Out Treads
Inspect each unit separately. Do you notice any cracks on the external treads? Perhaps they’re smoother than the middle treads?
If so, get your gauge out and take a tire pressure reading. You might have a case of low inflation on your hands.
Choosing a Quality Tire Gauge
If you own an air compressor that came with accessories, go through them. A gauge may have been included with the purchase to help you check tire pressure.
If not, a gauge is a useful device to invest in. You can keep it in your garage or your trunk to check your tire pressure whenever necessary.
Keep in mind that you’re going to be doing this at regular intervals. It won’t be left forgotten in a dark corner of your garage.
Using a gauge is non-negotiable. You can’t play a guessing game — you need to know the exact PSI. There are three types of tire pressure gauges: dial, digital, or needle.
- Dial: Dial gauges have displays that resemble clock faces. They’re simple to read: a needle will settle on the PSI rating. You should pick a quality model if you choose a dial. Cheaply built ones can give you less accurate readings.
- Digital: These will interest the tech heads out there. The PSI reading will appear on a screen that may light up depending on the brand. They’re usually powered by standard batteries. Digital models are known for accuracy but can be expensive.
- Needle or Stick: These varieties are slim and compact, resembling oversized pens. The PSI rating will appear on a slim thermometer-like protrusion at the end. Of all three types of gauges, they tend to be the least costly. At the same time, they’re a little more challenging to read. Those of you with poor eyesight may prefer a larger display.
What About the Air Source?
If you’re not using a gas station air pump, you’ll either be using a standard pump or a good home garage compressor. If you don’t have either available at home, you can go to your local gas station or garage.
Gas stations in certain states are obligated to provide free air. You can check online to see what options you have near you.
- Using Air Pumps: There’s nothing wrong with using a bicycle or portable pump to add air. However, getting your tires inflated may be more time-consuming than you expect.
- Using an Air Compressor: An air compressor can speed things up significantly. If you’re not willing to buy one, check if anyone you know has one and would be willing to loan it out.
Only Check and Inflate Tires When Cold
Here’s a helpful tip: don’t start checking or inflating until your tires are cold. Warm or heated air will expand, which can give you a false reading.
The climate in your region will determine how long they take to cool off. On hotter days, wait at least a few hours after driving for your tires to cool. If it’s freezing outside, you can get to work after just half an hour or so.
Final Thoughts
We hope this article on how to put air in tires has been helpful to you.
Regular maintenance can make a big difference in how safe your vehicle is to operate. Your wheels are quite literally the foundation of your car. It’s important to ensure they’re inflated correctly and in good shape.
Got any questions we haven’t answered or feedback to share? Please leave us a comment below. We look forward to your input, and we’ll answer each one of you.